
We need to talk!
Taking screenshots of entire web pages to provide feedback to devs or designers won’t cut it anymore.
It’s just too time-consuming and resource-intensive.
We’re here to show you how to annotate a website and transform your proofing process.
Namely, this post is going to cover:
- What web annotations are
- How annotating websites can make your life easier
- How to annotate a website
- Four website annotation tools you can use to get started
Let’s get into it!
Table of contents
What is website annotation?
Website annotation is the process of adding comments or notes to a markup of a live webpage without editing the HTML code. Furthermore, the added comments are visible to other users who are sharing the same annotation tool or service.
In other words, annotating web pages is an easy way to provide feedback when reviewing your team’s web design projects.
Moreover, web annotation systems offer you the ability to give contextual feedback, thus helping you save time and become more efficient as a reviewer.
Instead of spending hours writing endless threads of context-less comments your designers then need to decipher, you can spend seconds simply clicking anywhere in the section you want to make changes and dropping a pin directly on the element you want to be modified.
It’s that easy.

Let’s look at a quick example using MarkUp.io (sound familiar?). With this tool, all you have to do to create a web markup and start annotating is to either enter a URL into the URL bar on MarkUp.io or install the MarkUp for Chrome extension and select the “Create MarkUp” button.
That’s it!
Now, you can immediately start leaving comments wherever you feel like it.

Now, let’s have a look at who benefits the most from utilizing web annotation systems like MarkUp.io.
Who benefits from website annotation tools, and how?
Web annotation systems are useful tools for individuals and businesses across multiple industries, such as education, marketing, web development, and more.
With web annotation tools, professionals have the ability to:
- Improve web content and design through concise feedback
- Leverage frictionless collaboration and communication
- Boost productivity and efficiency
- Minimize feedback loops and reduce unnecessary email exchanges

Let’s dive into the four most common use cases for website annotation systems, as well as the benefits these business categories can harness by annotating content on websites.
1. Creative agencies
Creative agencies are usually working under the constant pressure of tight deadlines and insane workflows.
And you know what’s even more insane? The challenging part of these professionals’ work lives is not even juggling deadlines and projects.
It’s the constant haggling over email with clients and higher-ups who have conflicting artistic visions with the creatives.
On top of that, some of these reviewers have different expertise and professional backgrounds than, say, digital marketers, bloggers, and other types of content creators.
The result?
People trying to get on the same page while speaking different languages.
It’s not pretty.
If you’ve ever had to send one of those “as per my last email” messages, then you know exactly what we’re talking about.
This is the main pain point that web annotation systems address. And, believe it or not, you can get everyone singing the same song with a couple of clicks and a link.
But it’s not just creatives who are breathing a sigh of relief right now. The same goes for developers.
2. Developers
Did you know that more than half of small businesses outsource their web development needs?
Those businesses and offshore developers are both feedback-reliant.
Imagine the process of a not so tech-savvy manager giving feedback to a developer using anything but web development vocabulary.
Must be painful.
At the same time, let’s not forget that roughly 70% of businesses that resort to web development outsourcing do so to cut costs.
This basically means that businesses look for lower hourly rates, which can usually be found in economically developing countries.
So, (possibly) non-tech people giving feedback to devs who speak English as a second language over long emails or never-ending calls?
Ouch!
Wouldn’t it be easier to just annotate web pages with easy-to-understand comments?
You already know the answer to that question (and if you’re a little lost, we have a hint for you: “Yes, it would”).
When incorporating website annotations into your workflow, you and your collaborators save a lot of time and make things easier for everyone involved in the process.
Designers, is this super relatable for you as well?
3. Designers
Design teams go through similar hardships when trying to get design assets approved.
This is especially true for freelance designers, who account for as much as 90% of this industry’s demographics.
The review process usually goes as follows:
- Exporting designs in PDF documents
- Sending designs over email for review
- Receiving vague or confusing feedback via Microsoft Paint-doodled screenshots
- Wasting time deciphering what the client meant to say and still getting it wrong sometimes (ugh, we’ve been there)
- The second round of feedback
- Designers wondering what they’ve done to deserve this
- Clients getting frustrated
- Finally getting everyone on the same page
- Rinse and repeat
What if we told you that this overly-complicated process can be reduced to four simple steps? Check it out:
- The designer creates a markup with the deliverables and shares it with the client via a link
- The client adds notes right on the design markup
- The designer implements the feedback
- The client approves the design
- Everyone blinks in amazement at just how easy that process was
Isn’t it convenient?
Remote teams can also implement a similar workflow—which brings us to our next point.
4. Remote teams
According to Forbes, by 2025, 36 million Americans will be working remotely.
The professionals filling these remote roles don’t have the possibility of relying on in-person communication to discuss projects with co-workers.
In this case, collaboration is solely digital.
That’s the reason why many remote-first businesses have integrated collaborative tools such as Google Drive and Google Docs into their workflows.
Sure, this service is great for adding notes to text.
But what about graphics? Or PDFs? In short, not all projects can be done in Google Docs.
While Google Docs is great for a lot of things, at the end of the day, the tool just doesn’t support sharing and annotating video projects, live websites, and other file formats.
The solution to painless file sharing and deliverable proofing for everyone?
Enter…annotation apps.
When we say everyone, we mean it! Even teachers and students can use annotation tools to simplify their lives.
5. Teachers and students
There’s no secret that the education industry revolves heavily around research and proofing students’ assignments.
That’s exactly the direction in which the functionality of annotation tools is expanding towards.
Namely, digital sticky notes and bookmarks help students and teachers annotate readings in a much easier way.
Not only that, but annotation technology also helps people keep their notes organized as opposed to having pieces of paper with valuable information stored all over the place.
Piecing those together is no fun—unless you’re a puzzle enthusiast. And even then, who wants to solve a puzzle that didn’t need to be an issue in the first place?
Plus, teachers can proof student submissions quickly and easily when using annotation software.
Now that you know who can benefit from web annotations, let’s see how you can annotate a website in the blink of an eye.
How to annotate a website in 4 easy steps
To show you just how easy it is to start annotating a website with our platform, we’ve broken down the process into four steps that are super easy to follow.
Let’s have a look at the first one.
Step #1: Signup with MarkUp.io
Believe it or not, MarkUp.io is a visual commenting platform that offers a free plan for users.

You can sign up for an account without entering your credit card information.
You just input your email, choose a password, and presto! You just got yourself your very own MarkUp.io account.
Step #2: Download the MarkUp For Chrome extension
Next, install our Chrome extension from the Chrome web store.

This little add-on makes annotating as simple as bookmarking your favorite web page.
Specifically, it acts like a MarkUp.io shortcut for easy markup creation with just one click.
Additionally, you can use the extension to open any markup you’ve created using our platform.
When clicking the “Create MarkUp” button, your website markup will instantly open in a new tab where you can add notes and comments.

If you’re not a Chrome browser enthusiast, worry not!
MarkUp.io works on any web browser, including Mozilla Firefox, Apple’s Safari, and Microsoft Edge.
If you’re using any of the previously mentioned browsers, head over to step number three.
Step #3: Enter a website URL
Step number three is actually an alternative to step number two, meaning that you can also annotate webpages without the browser extension.
To do so, you’ll have to go to your MarkUp.io dashboard first.
Then, enter the URL of the page you want to create a markup of in the “Enter a URL here” field. Next, click on the “Go” button.

As soon as you do that, you will have a brand-new, high-quality copy of the desired web page and can start working on step number four.
Step #4: Start annotating
Now all that’s left to do is to begin adding comments to your website markup.
To do so, you can click anywhere on the screen and write your feedback.
The annotating toolbar will allow you to:
- Format text
- Add image or video attachments
- Embed links in the comments
Moreover, when you add notes, the people you’ve shared the markup with can see them in real-time.
This streamlines the whole process, enabling devs and designers to implement feedback at the same time you’re posting your comments.
As your collaborators make your suggested edits, they will resolve the related comments.
This doesn’t mean those comments will disappear though! You can find all resolved comments in the aptly-named “Resolved” section.

This offers you better visibility into the progress of each project you’re working on.
That’s about it.
We told you it’s super easy! And we bet you’re just chomping at the bit to get started – and we’ve got you covered!
Head over to the next section to learn about four of the best website annotation tools available on today’s market.
Top 4 website annotation tools
Finally, here comes the juicy part!
We’re talking about the stars of today’s show:
- MarkUp.io
- Pastel
- Markup Hero
- Hypothes.is

For a more comprehensive list of solutions, feel free to read our post on annotation tools where we discuss the pricing and features of 11 such platforms.
Please, after you.
Tool #1: MarkUp.io
Let’s start with the platform that needs no introduction (mainly because we’ve been talking about it throughout this entire article) – MarkUp.io.

Our tool offers users the ability to provide real-time feedback using any device and from their browser of choice.
When annotating a project in MarkUp.io, you are able to pin your notes directly to a specific page or area within the site and give your feedback that much-needed context you didn’t even know you needed.
Say goodbye to trying (and failing) to explain which design element you want to be changed, how it should be changed, and where it is located on the website.
With MarkUp.io, you can create a canvas of any website with a click of a button. And, with another click, you’ll be able to provide concise feedback.
What’s more, our collaborative annotation system also offers features such as:
- PDF annotations
- Image annotations
- Video annotations (learn more about our latest feature here)
- Account-level permissions and team management (coming soon!)
- MarkUp annotation notifications
And more!
With that out of the way, let’s move on to solution number two.
Tool #2: Pastel
Second on our list is Pastel, an annotation tool for developers and designers.
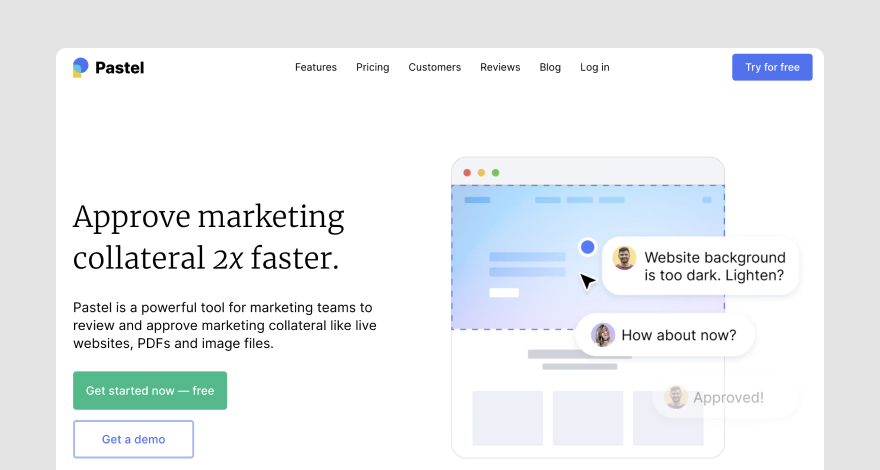
Pastel enables users to share and get feedback on multiple digital assets, such as live websites, PDFs, and images.
Moreover, this tool also helps you:
- Annotate text
- Keep feedback organized with labels
- Make copy-level edits on a website markup
- Collaborate with team members, stakeholders, and clients via shareable links
Going further…
Tool #3: Markup Hero
The third tool we’re gonna have a look at is Markup Hero.

Markup Hero is a comprehensive solution for reviewing and annotating text, webpages, PDFs, and images.
When using this tool, you can edit or comment on uploaded files using text and text highlights.
Alternatively, you can use drawing tools to give a more visually detailed explanation of the changes you’d like made.
Last, but not least…
Tool #4: Hypothes.is
The last web annotation solution on our list is Hypothes.is, which is a great research tool for both public and private annotations.
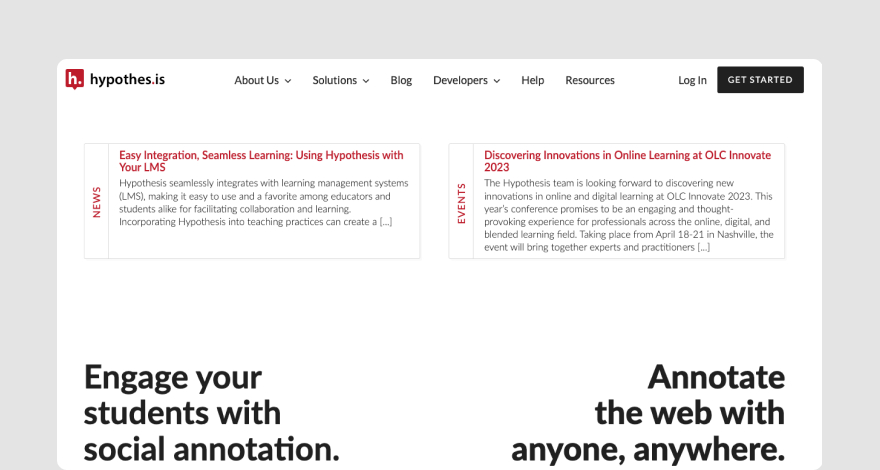
Hypothes.is is a social annotation software solution that enables users to make web annotations.
The platform allows users to highlight text and take notes on web pages in a contextual way.
Furthermore, it has been called “a peer review layer for the entire Internet” because it encourages users to comment on paragraphs of selected text and assess sources whenever they encounter something that sparks their interest.
In short, this platform facilitates the peer review of digital content with the use of public annotations.
Cool, right?
It basically makes the information inside online articles more reliable for its users.
And this brings us to the end of our list.
Let’s wrap it up!
Over to you
We truly hope this post has offered you an overview of how useful website annotations are for everyone with a workflow reliant on proofing and providing feedback.
If you want to take it up a notch, you’ll be happy to find out that you can sign up with MarkUp for free!
You’ll be making your own website annotations in no time.
Frequently asked questions (FAQs)
One more thing before you go.
We’ve gathered the most common FAQs about how to annotate a website and answered them below.
Take a look, and if by the end of this section, you still have questions, please don’t hesitate to reach out to us.
We’ll be more than happy to help!
Q1. Can you annotate a web page?
Of course you can annotate a web page; in fact, it can be quite easy to do if you use an annotation tool like MarkUp.io.
Q2. How do I annotate a website on my laptop?
To annotate a website on your laptop you first need to create a markup by simply pasting the URL of the website into the “Enter a URL here” field on your MarkUp.io dashboard.
As soon as you do that, our platform creates a markup of the respective website, where you can start adding your feedback and annotations in the comments.
Q3. How do I annotate a website in Chrome?
To annotate a website in Chrome you need to install the MarkUp.io Chrome extension.
Then, you can simply create a markup of any web page on the internet by simply hitting the “Create MarkUp” button. After you do so, you can instantly start annotating.