
There was a time when reviewing videos was like watching a movie. You gathered your team in a conference room. Watched the video. And paused every two seconds to comment on it.
The only thing missing was the popcorn. 🍿
While it was certainly a lively team activity, the downside was that it consumed a significant amount of time. With numerous ideas floating around, you’d find yourself hurriedly jotting down notes, only to realize you’ve recorded what someone ate for breakfast instead of their valuable input.
It was all too easy for things to go off track, which wasn’t exactly fun. 🙄
Since then, a new way to leave feedback on videos has arrived. It’s called an annotation tool — a collaborative space where you store feedback from your stakeholders.
What’s even better? You can draw lines and shapes on the video to get your point across better.
There’s a slight hitch, though. How do you do that?
We can show you how with the help of a few tools. Think of us as your sensei on doodling.
By the end of this article, you’ll be a mini master yourself. 😉
Table of contents
Best software to draw on videos for collaborative feedback
Best practices for video annotation and drawn feedback
How to avoid common mistakes when drawing on videos
Best software to draw on videos for collaborative feedback
Our first lesson starts with a decision.
One that involves choosing the software you’ll use for gathering feedback. And allows you to draw on videos, of course.
Unlike other senseis, we won’t send you into the wild to find it yourself. We’re giving you three of the best options. So you can choose for yourself.
And since we’re good teachers, we’ll also describe them for you.
Together, let’s look at what these tools can do for you and how you can use them to draw on videos.
Tool #1: MarkUp.io
Allow me to introduce you, dear student, to MarkUp.io.
It’s a beautiful video annotation tool with a free spirit. It allows you to visually express your thoughts with creativity and precision.
MarkUp.io is also impressively versatile, supporting a wide array of file types.
From PDFs and websites to images and videos, you can boost user interaction and feedback within any digital asset.
MarkUp.io gives you all the tools you need to draw on videos, whether it’s a YouTube video or a short one for TikTok.
Use freehand drawings, shapes, and pointers to illustrate directly on your digital content. MarkUp.io makes you feel like a true artist and its platform is your canvas.
Here, we can show you how through a step-by-step tutorial.
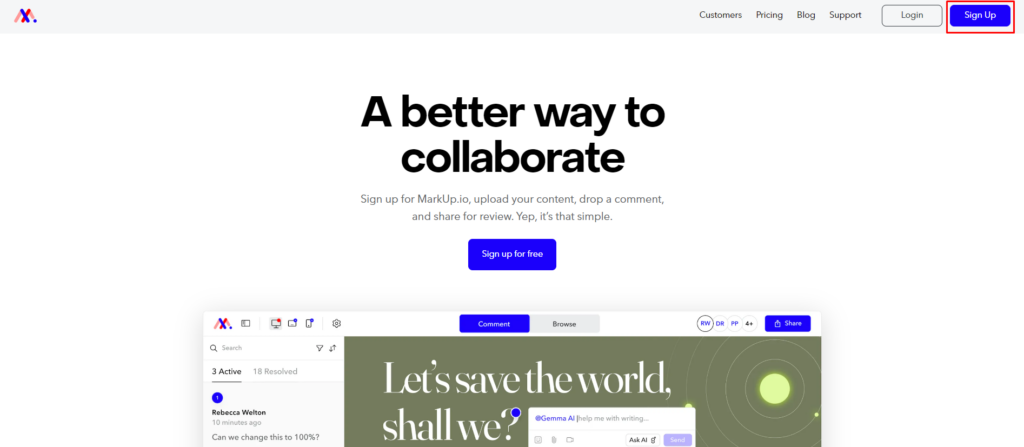
Step 1: Sign up for an account (if you don’t have one already 😉).
Do so by accessing the homepage. And clicking on the Sign Up button in the top right corner.
When you’ve successfully logged in, you’ll see your brand-new Workspace.
Step 2: Start uploading videos! Click on the big blue Upload button. Select your file directly from your media library.
Then, open it!
You’ll quickly notice that you can pause the video anytime you want. And leave comments frame-by-frame.
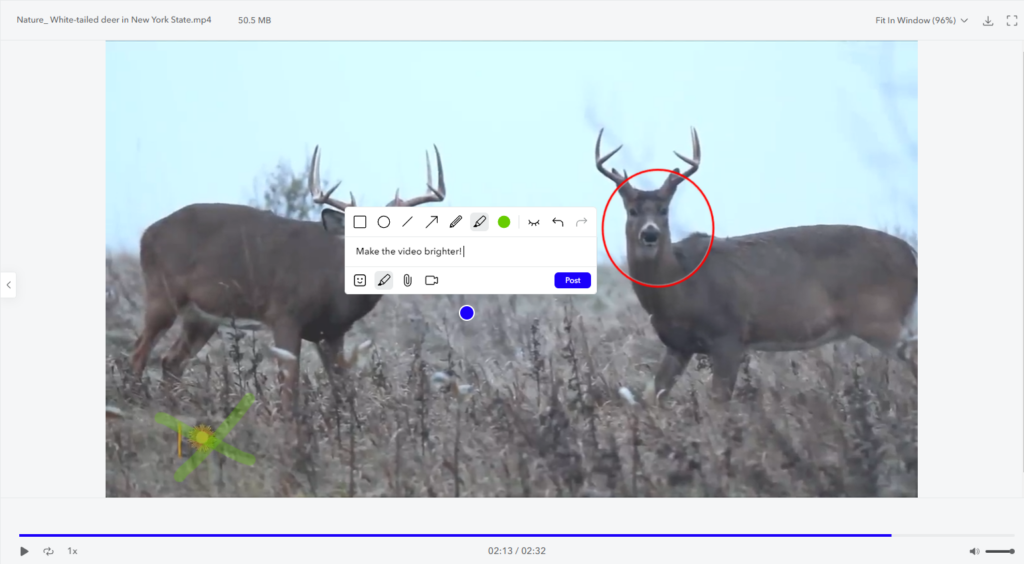
Step 3: When you find the video frame you like, click anywhere on the screen. A text box will appear. But you’ll have to select the Pen tool to access the palette.
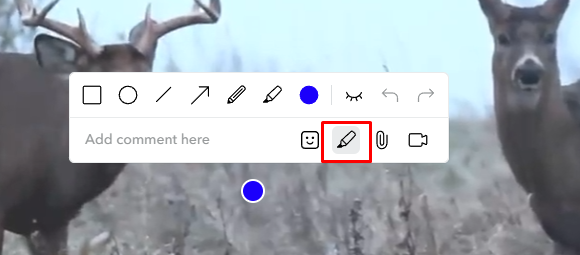
Now, choose the tool you like and get to drawing!
Add all your thoughts on the canvas. And show off your drawing skills; the world’s your oyster.
Key features:
- Freehand drawing: MarkUp is all about nuance and freedom. You can draw directly on your uploaded content to make your thoughts more visible.
- Color palette: Maybe you want to draw yourself. Or use shapes to give your thoughts life. Either way, we don’t judge. MarkUp has a selection of colors available to make annotation easier.
- Adaptability: You can render annotations as screenshots when you apply them to website MarkUps. It keeps everything accurate on any device.
Free to use/try? Yes!
| Pros | Cons |
| It’s very easy to use Has an intuitive design Very easy to share your files | Doesn’t support .fig files for Figma Long website-loading times |
Tool #2: Microsoft Photos
“What’s Microsoft Photos got to do with videos?”
A good question, young Padawan. You might be outraged by our selection, but we put it here for a reason.
Microsoft Photos, whether you were aware of it or not, has a markup feature. It lets you add your own personal touch to your video files.
You can draw directly on screen without needing fancy collaborative video editing software like Final Cut Pro or Adobe Premiere Pro.
Since it’s a photo app, you can download and install it from the Microsoft Store.
Plus, it’s woven into the fabric of Windows. You just have to open the photo or video and select the Edit button from the top of your screen.
Then, a whole new world will open up. Just click on Markup and select one of the three drawing tools (2 pens, 1 highlighter) from the toolbar. Go further by choosing the type of line, color, and size of the pen.
If you mess up, don’t worry. You have an Eraser tool that can undo all your beautiful mistakes.
Key features:
- Easy, intuitive, and elegant app design.
- Back up your photos and videos on OneDrive.
- Multiple drawing tools, line types, colors, and pen sizes.
Free to use/try? Yes (with in-app purchases for advanced features).
| Pros | Cons |
| Simple interface Integrates with OneDrive Video editing with text and transitions | No before-and-after view No advanced editing features |
Tool #3: iMovie
If there’s Windows, there has to be iOS too. And we can’t neglect Apple users.
So, our last option is for those who prefer working on a Mac, iPhone, or iPad. iMovie is a free app for editing videos made for Apple.
While this lil video maker has a range of video effects like color correction, it’s very beginner-friendly. Anyone can use it to make a video for their social media post, YouTube channel, or for their brand.
But this article is not for video editing software. So, the big question is: can you draw on the video? Yes, you can.
It takes a few steps, though. You won’t edit the video directly, but:
- Open a random photo. You convert it to .png from the pop-up box. A blank screen will magically appear on the screen.
- Select Tools/Annotations/Line from the menu. A toolbar will appear at the top. Now’s the time to get creative. And bring your creations to life!
- Once you’re done, save the image on the desktop. Drag it into your video project. And drop it on top of a frame in the timeline.
Might be a bit roundabout, but it’s definitely useful for Apple lovers.
Key features:
- You have a timeline where you can see your frames.
- It’s easy to share your edited movie with other peers.
- Has many templates that can help you customize your videos.
Free to use/try? Yes!
| Pros | Cons |
| It’s a high-quality video editor It’s free for all Apple products Great file management system | It’s only for Apple devices Slow processing times |
***
’Tis the time to make a choice. Which tool are you going to use?
MarkUp.io — the best tool for leaving comments and constructive feedback on videos? Microsoft Photos, a simple and intuitive tool for Windows? Or are you an Apple fan and want to use iMovie?
The choice is yours.
Before you close this tab, we want to share more of our infinite wisdom with you.
Stay with us. And let’s chat about the best practices for video annotation and drawn feedback.
Best practices for video annotation and drawn feedback
Our second lesson is this: in this fast-paced world of video production, the right annotation tool is not just a convenience, but a necessity. Otherwise, it’s just an app on your computer, especially if you don’t know how to use it.
That’s why mastering these tools can make or break your project’s success.
A master of feedback like us knows the secrets of effective video annotation and drawn feedback. And we’ll share it with you, dearest student.
Firstly, you need to know your tool like the back of your hand. You have an array of pens and highlighters and lines and shapers that help you convey your thoughts the best.
Each has a purpose.
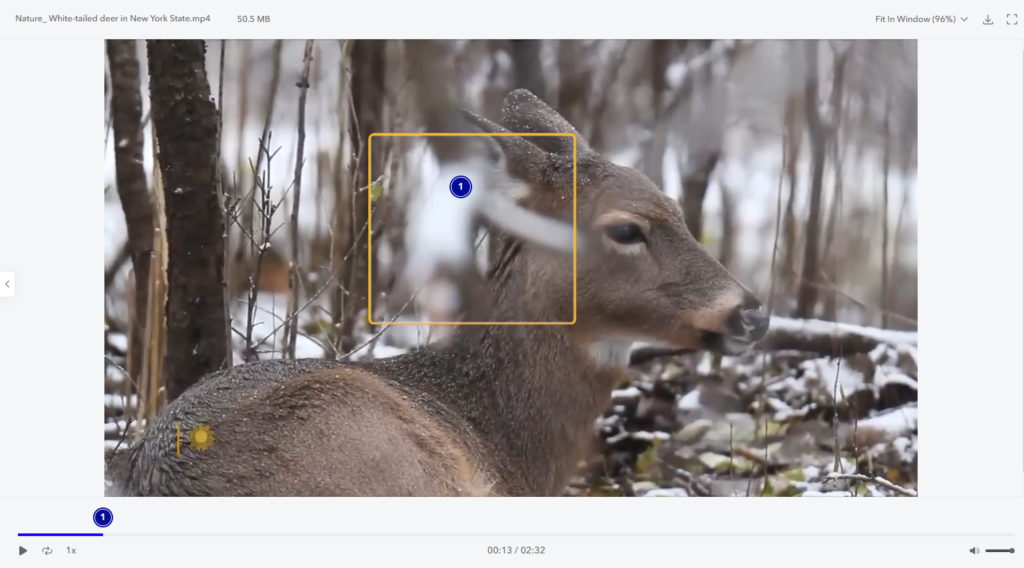
For example, you can use the shape tool to highlight certain points in your video. Let’s say you want to add text to a larger area; use the shape tool to designate the area you want to introduce the text.
On the other hand, you have arrows that can help you point to specific areas. For instance, you want to emphasize something people don’t readily see, like the word “collaboration” in a sentence.
But there are plenty of other tools you can use. It’s vital to choose a tool that has a kit with everything, such as progress bars, bounding boxes, polygons, and so on.
Secondly, try to find a tool that lets you create markups directly on top of your videos or screen recordings.
Some tools have a more convoluted process, like iMovie. But solutions like MarkUp.io let you leave pixel-accurate comments wherever you want, even by timestamp.
Having a less-convoluted annotation process helps people find information easily. Instead of having unclear feedback, you can see exactly what needs to be changed.
Which also saves you from the back-and-forth that usually comes with misunderstandings. 😁
All these features we’ve talked about (the pens and highlighters and arrows) enable better collaboration. Translation? The annotation platform you select should be a collaborative workspace where you can easily share your videos with your team and stakeholders.
For instance, MarkUp.io has a feature where you can copy the link of any comment you leave. Why is this useful? Because you share specific pieces of feedback with the responsible person without dumping all the comments on them.
The feedback process is streamlined and easy to follow, allowing better communication between teams.
In conclusion, with the right tool at your side, you can make your drawn feedback clear and constructive.
It should help you collaborate with your team effectively. And bring you all together.
Before we wrap this up, let’s look over the most common mistakes people make when drawing on videos.
How to avoid common mistakes when drawing on videos
Our last lesson for today is about mistakes.
We all make mistakes. Some might cost us dearly. While others just make us blush in embarrassment.
Sometimes, even with an annotation tool, you can make beautiful mistakes. Oops. Not HUUUUGE ones, of course, but small ones that still disrupt our flow.
Like misclicking and leaving a comment that makes no sense for the other person. Or using too many arrows and shapes and colors and creating the new Mona Lisa.
Don’t worry — it happens.
But to avoid creating even more confusions and get back to convoluted feedback processes (which you’ve tried hard to get rid of), you need to be aware of these mistakes:
- Misplacement of annotations: Hey, misclicks happen. We can forgive you once or twice. But if it happens too often, it only leads to confusion.
Maybe you want to talk about the font, but you end up placing your comment on the main character’s face. People will wonder what you meant — and it halts the natural flow of feedback.
Find a tool that lets you put pins wherever you want. But don’t throw them haphazardly.
- Lack of clarity: We’ve all had bad feedback at some point. Comments that make you hate your life, such as ‘I like this, but it needs more Oomph!’ Whatever that means…
When it comes to drawing videos, things might get even more unclear. What’s that squiggle supposed to mean? Is that a circle or a heart?
Try to leave clear and detailed drawn feedback by using the tools at your disposal to highlight the issues. Be constructive; don’t use vague or negative comments and provide concrete suggestions rather than say things just for the sake of saying something.
Oh, and encourage your peers to do the same.
- Overuse and underuse: It’s great that you have many thoughts inside your head. And want to express them all by drawing.
But too much might convolute the message and overwhelm the viewers. Instead of having a clean, organized screen, there are thousands of colors, shapes, and words. It’ll only confuse whoever is watching.
Keep your drawings organized. Draw just enough to get your point across while maintaining the original meaning.
You know what to avoid. What to do better. Which tool to choose.
There’s nothing left to teach you, youngling. But before you leave our dojo…
Ready to start annotating your videos?
Good, youngling. You’ve managed to complete all our lessons for today. You can take a well-deserved rest now.
And we’ll see you soon on another topic.
But before you go, we want to give you a taste of MarkUp.io.
This annotation tool opens up a new and better way to collaborate. It’s an opportunity you shouldn’t pass up.
Because, with MarkUp.io, you can become the Picasso of drawing on videos.
It’s insanely easy to draw on, share, and upload videos. You don’t even need to switch apps. The single MarkUp.io Workspace is enough to collaborate with as many users as you want.
Ready to test it? Get a sample of it in this free 30-day trial.