
How do you handle design feedback?
Please don’t say email threads of confusing doodled screenshots…🤞
Before you send that email, we’ve got a better idea.
Image annotation is a much simpler way to proof design deliverables than requesting revisions over email (with those pesky doodled screenshots!).
If you don’t know how to annotate an image, this guide will help you get started with insights on:
- What image annotation is and its benefits
- How to annotate an image in three easy steps
- Four image annotation tools
Let’s get right to it!
Disclaimer: The information presented in this article was collected from publicly available sources and updated on January 12th, 2024.
Table of contents
What is image annotation & why is it useful?
Image annotation is the process of reviewing static design elements by leaving visual comments.
Moreover, image annotation is an important step in the design proofing process that takes place before sign-off. The process includes:
- Reviewing design elements
- Providing feedback
- Requesting revisions
With image annotation, creative professionals can submit their drafts for review using two methods:
- Sending deliverables over real-time communication channels (Slack, Zoom, email, etc.)
- Using image annotation tools that make asynchronous collaboration easy.
Only the brave would choose to request design feedback over email or Slack. This method requires lots of patience and design-literate clients and higher-ups, which is not always possible.
It usually goes like this:
- Designers send deliverables over for review.
- Clients doodle right on the designs using tools like Microsoft Paint and provide extra written feedback to clarify the doodles over email or Slack.
- Designers get confused.
- Clients get frustrated.
- Deadlines are missed.
Using annotation tools makes this process so much easier. Namely, image annotation software simplifies the proofing process by eliminating the need for overcomplicated explanations.
Take a look at the image below to see how easy it is to get your point across without creating endless email threads.
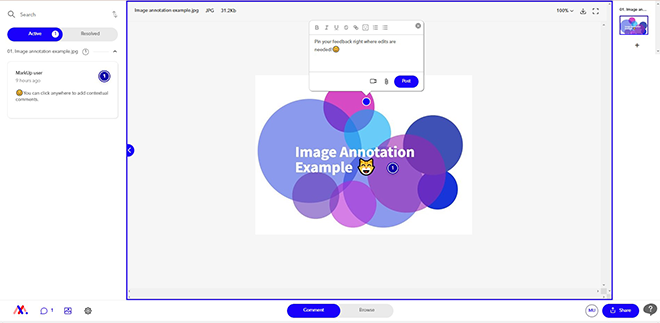
By clicking on the element you want to be changed, you can leave a comment with contextual feedback that is easy to understand and implement.
But the benefits of using image annotation solutions don’t stop here!
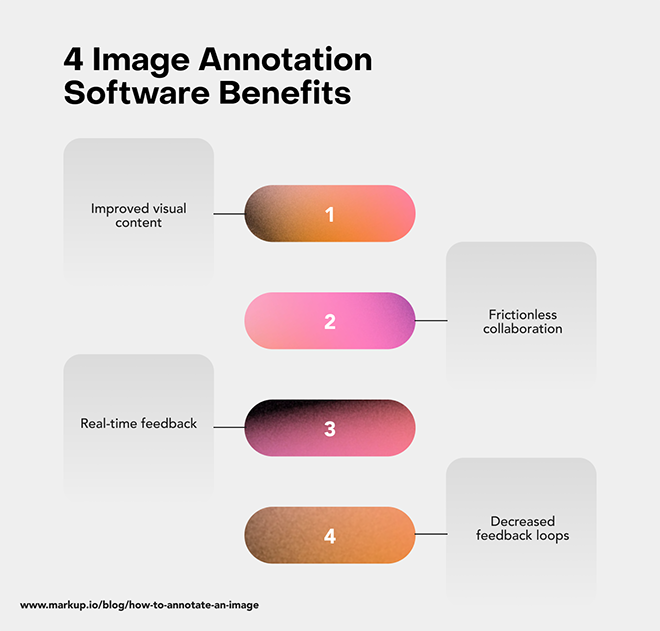
Benefit #1: Improved visual content 👀
When feedback is contextual, it is more effective because it is easier to comprehend.
Image annotation tools help designers and clients speak the same language and speed up the review process through relevant comments pinned on elements that need to be changed.
Benefit #2: Frictionless collaboration and communication 😅
Image annotation tools make remote collaboration easier by enabling creatives to share design markups with collaborators via links.
Then, the reviewers can simply open the markup in their web browser and add contextual comments with just a few clicks.
There’s no need for endless email chains, long messages on Slack, or ad-hoc Zoom meetings. Thus, communication is streamlined and collaboration becomes frictionless.
Benefit #3: Real-time feedback (all in one place 😏)
When using image annotation tools, your collaborators are able to see the added feedback in real-time!
Plus, you will have a feedback archive right at your fingertips with all the comments in a single repository.
Bye-bye, siloed feedback!
Benefit #4: Shorter feedback loops 🎉
Because image annotation makes feedback so easy to get right the first time, teams can skip endless rounds of review and get quicker project sign-offs. Suddenly, you’re at the final draft stage much more quickly than you may have thought was possible.
Image annotation: 4 most common use cases
Image annotation is super helpful across industries—from education to marketing and anything in between.
Put simply, image annotation can simplify the workflow of anyone who is familiar with constantly going back and forth during rounds of proofing.
To give you a clearer idea of what we’re talking about, let’s take a look at the most common image annotation use cases below.
1. Image annotation for designers
This is the most obvious one. Image annotation is extremely popular among designers, and for good reason—it makes their lives easier.
With image annotation tools, designers can enjoy a hassle-free proofing process by getting prompt feedback from collaborators.
2. Image annotation for creative agencies
Similar to designers, creative agencies deal with a lot of visual content that needs reviewing.
Instead of opening Pandora’s box by asking for feedback over email, a lot of creatives prefer using image annotation tools to make the image review process easier.
3. Image annotation for teachers and students
Teachers also need an easier way to mark assignments—and image annotation tools can offer them the break they need.
Students can submit their presentations, art projects, and other visual-content-centered assignments for review using image annotation tools.
Then, teachers can quickly access and provide feedback on students’ homework with the simplicity of clicking a button.
4. Image annotation for remote teams
Remote teams are always on the lookout for new ways to improve collaboration. Guess what?
Remote workers can use image annotation tools to streamline communication with their distributed team members without the need for face-to-face interactions.
No need to ping everyone on Slack to ask for feedback anymore. A link and an email notification will get you there faster and easier.
Let’s see exactly how image annotation works and how you can use it to drive operational efficiencies.
Annotate an image in 3 steps (hassle-free)
Now, onto the fun part! We’re going to walk you through a tutorial on how to annotate images in three easy-to-follow steps.
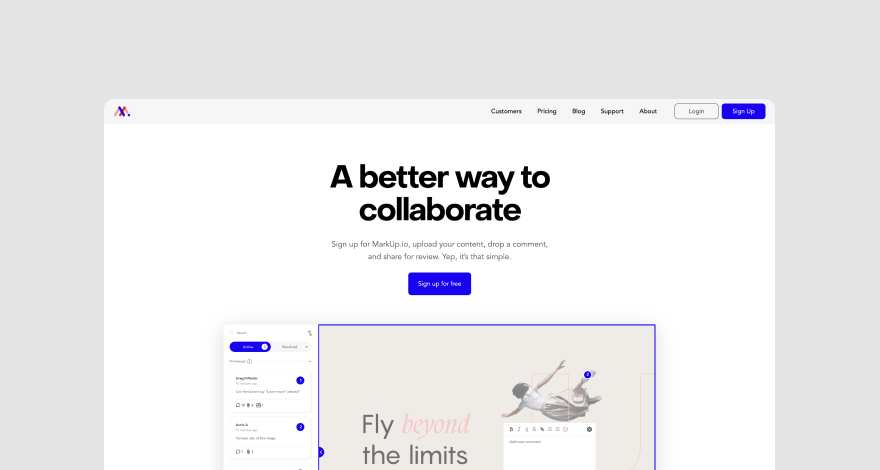
Step #1: Create an account with MarkUp.io
First, go to www.markup.io and click on the Sign Up button in the top right corner to start a free trial with MarkUp.io. (You can also create a free account on the free plan with limited features).
Step #2: Upload your image
Next, you can start creating MarkUps with your images. To do so, simply drag and drop files onto your MarkUp Workspace.
Alternatively, you can click on the Upload button and choose any image files from your computer.
Once the upload is complete, our platform creates a MarkUp you can view and manage from your workspace.
To open the created MarkUp, simply hover your cursor over it and click on the Open button.
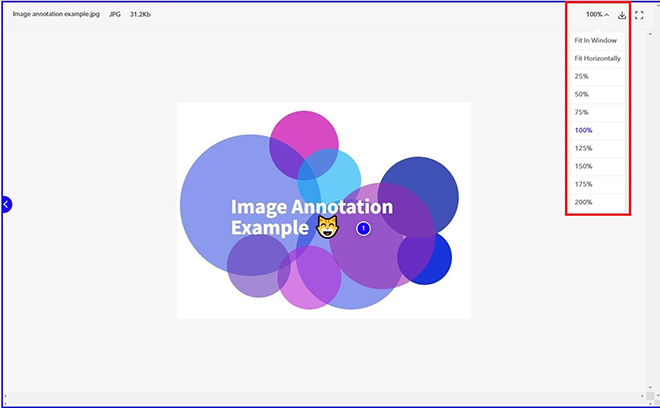
You can then resize the image by adjusting the zoom level from the top right corner of the screen.
Step #3: Start annotating your images
Begin adding contextual comments by clicking anywhere on the image. Once you click on an image element, a text box will pop up, and you can start typing in your feedback.
The comment toolbar allows you to format text, add links, attach images, add emojis, and more!
After you’re done writing and formatting your comment, click on the Post button to make your comment live. As soon as a comment is active, your collaborators will be able to view it as well.
As designers implement the feedback they receive, they can resolve addressed comments. These comments will appear in the Resolved tab—a feedback archive for your MarkUp.
Bonus Step: Share your MarkUps with your collaborators
After you’ve added your notes to the MarkUp, you can share them with your clients and other reviewers.
To do so, click on the Share button at the bottom right of the page and choose whether you’d like to share your MarkUp via email or by manually sharing the MarkUp link over your communication channel of choice.
That wasn’t so hard, was it?
We told you image annotation was easy!
If you’ve already decided you need it in your life, let’s have a look at the four best image annotation solutions. We’ll help you figure out which one best fits your business needs so you can start annotating right away.
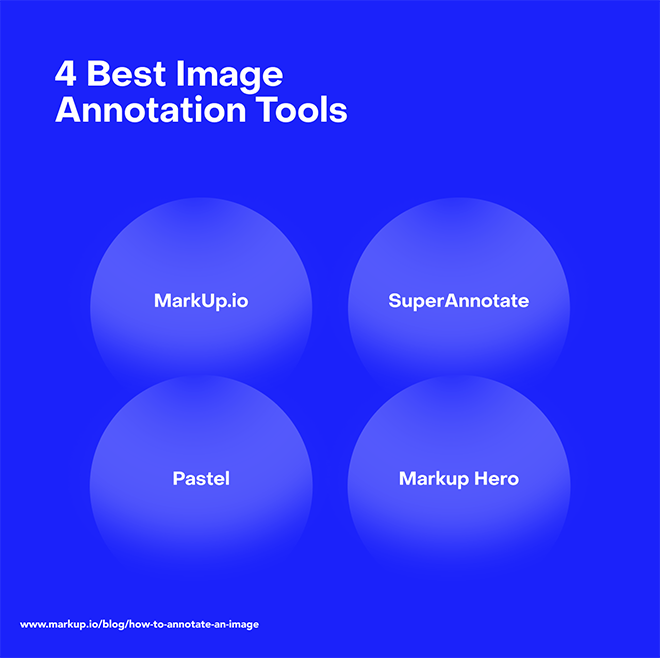
Top 4 tools for effective image annotation
We’ve compiled a round-up of four different types of tools that perform varying image annotation functions on a multitude of file types and purposes. Specifically, we’ll talk about:
- MarkUp.io
- SuperAnnotate
- Pastel
- Markup Hero
Tool #1: MarkUp.io
MarkUp.io is a real-time proofing and visual commenting platform that helps users request and provide contextual feedback easily.
With MarkUp.io, you can annotate images, PDFs, videos, Word documents, live websites, and other common file types.
In terms of image annotation, MarkUp.io supports a wide range of file formats, including JPG, JPEG, PNG, GIF, SVG, BMP, PSD, AI, EPS, TIFF, RTF, and PPTX.
To make your proofing process even easier, MarkUp.io also has a Loom integration that lets you attach quick video explanations to your comments.
With MarkUp.io, there’s no such thing as an annotation task that’s too difficult. 😉
Pricing
MarkUp.io offers two paid plans.
The Pro plan is optimal thanks to its enhanced organizational capabilities via Folders (and other features, like integrations). It’s $25 per month and can be used by teams of any size as its pricing covers unlimited users with no extra cost.
The Enterprise plan is customizable and available on demand.
On a budget? Don’t worry. You can use MarkUp.io for free — you just need to create an account.
Tool #2: SuperAnnotate
SuperAnnotate was developed for computer vision project automation and natural language processing (NLP).
It helps users to automate and scale their artificial intelligence (AI) pipelines and increase AI model accuracy through powerful data annotation tools.
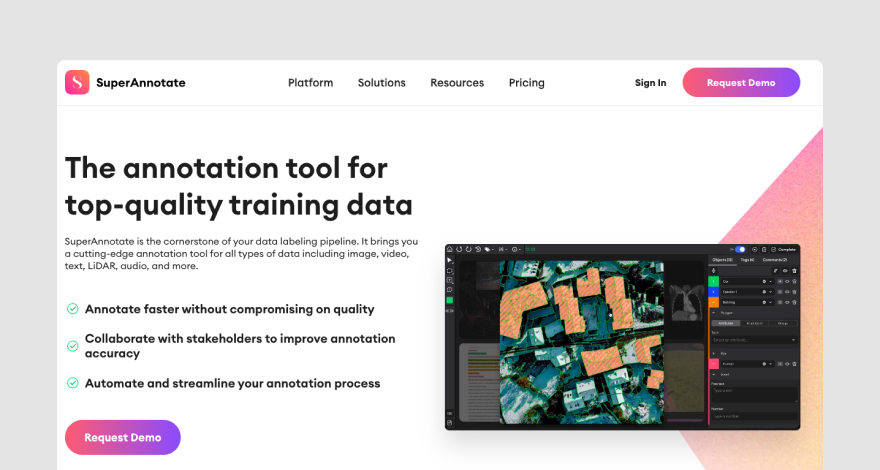
As you can probably already tell, SuperAnnotate is a different type of annotation tool.
Namely, this platform helps users train machine learning models with the help of image annotation. In this case, image annotation is based on adding labels that explain to ML models what images portray.
The SuperAnnotate platform features multiple capabilities that enable users to build more accurate data sets and successful ML pipelines faster.
Its features include:
- A pixel-accurate annotation editor and a vector editor
- Semantic segmentation and automation
- Annotation templates
- Effective team communication capabilities
Pricing
SuperAnnotate offers three pricing tiers, one of which is free for early-stage start-ups. The pricing of the other two premium plans is available only on demand.
Tool #3: Pastel
Pastel is an easy-to-use image annotation platform developed for marketing agencies and creative professionals that need to streamline their proofing process.
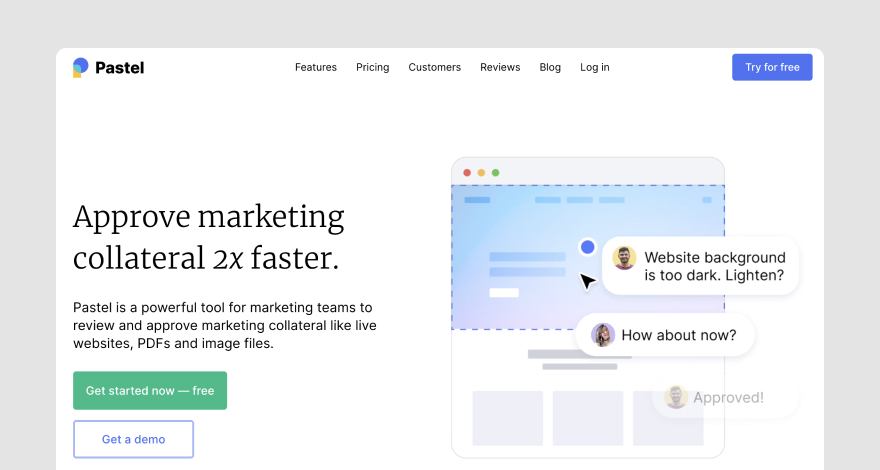
The platform aims to make creative work a lot less complicated by providing a digital environment where teams can safely store, share, and review media files.
Pastel features live web, PDF, and image annotation capabilities. In other words, this platform can be used by designers, marketers, developers, content writers, and any other professional who needs their work reviewed.
Pastel’s image annotation feature supports multiple file types that include JPGs, PNGs, and GIFs.
Pricing
Pastel features three premium plans that range between $24 per month and $350 per month. Additionally, Pastel users can opt for the Free Forever plan, which offers limited annotation capabilities and time-sensitive commenting features for one user.
Tool #4: Markup Hero
Markup Hero is a cross-system annotation tool suitable for Windows, MAC, and Linux devices.
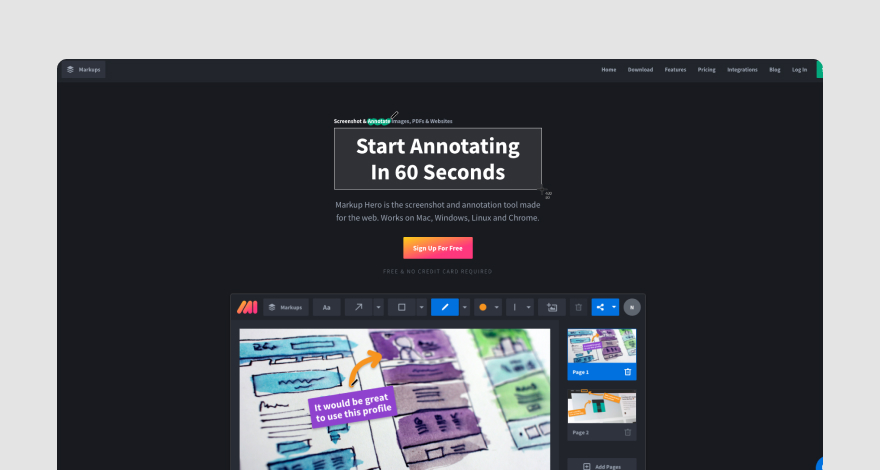
In addition to pinning text comments to images, Markup Hero enables users to leverage drawing tools (like fill color, arrow, line, oval, highlighter, pen, and other design tools) to easily highlight design elements that need edits.
Pricing
Markup Hero offers one paid pricing plan that costs $4 per month. The other two tiers are free and address the needs of freelancers who only need up to 10 markups per month.
That was a lot of information, wasn’t it? Now that you’re an image annotation expert, there is no better time to integrate image annotation into your creative workflow!
Over to you
You now know the benefits of image annotation, the tools you can use, and how to annotate an image without headaches.
Are you ready to take your proofing process to the next level?
We’re here to give you a helping hand!
Sign up at MarkUp.io and start annotating images like a pro.
Frequently asked questions (FAQs)
Q1. How do I annotate a JPEG image?
To annotate a JPEG image, you need to create an account on MarkUp.io and create an Image MarkUp by uploading your JPEG file to the platform.
Then, you can start adding comments to the parts of the image that need changes.
Q2. How do I annotate an image online?
To annotate an image online, all you need to do is sign up with your favorite image annotation software solution and create a markup with the image file you want to annotate.
After uploading the image, you can add contextual annotations to your markup.
Q3. How do I annotate an image in Chrome?
To annotate an image in Chrome, you need to install the MarkUp.io Chrome extension that enables you to create MarkUps of live websites.
Another way to annotate images in Chrome is to simply open MarkUp.io in your Chrome browser and upload the image you want to annotate to the platform.