
Whether you’re building a new website or waiting for it to go live, we know you can’t wait for the website launch.
Nothing compares to the feeling of launching your own website, right?
Even though having an informative new site is great, the site launch can be quite a stressful event.
To help ease your nerves, we’ve prepared a complete guide on how to prepare for your awesome website launch.
You’ll need to follow 12 easy steps to complete your launch checklist and ensure a successful release.
Let’s get started!🤩
Table of Contents
#1: Find a good domain name
One of the first steps you need to take in the pre-launch phase is to find a good domain name.
A domain name is a virtual address where your business lives. Unlike a regular address, however, you can choose a domain name that can easily help you market your business.
Successful businesses and entrepreneurs with thriving websites have specific domain names.
Successful domain names clearly tell their audience the types of content they can expect from that site. They have the added bonus of creating trust in visitors and helping the website rank higher in search results.
That’s why short, catchy, and creative domain names are the best!
Aside from being available, a good domain name should be:
- Short and easy to spell
- Super easy to remember
- Descriptive (i.e., containing keywords related to what your site is promoting)
- Branded (ideally)
Additionally, your domain should have a common CTLD (Country Code Top Level Domain) like “.com” or “.org”.
A note about subdomains
At this point, you may be asking, “why do I need a domain name when I can get a subdomain for free?”
We’re glad you brought that up!
With tools like Wix and WordPress, you can build a website without investing in a domain. However, we still recommend you buy a domain before launching your website.
We know most no-code and low-code platforms offer free subdomains to their users. However, using a subdomain might not help you establish consumer trust in your brand.
Further, a domain name gives your business an instant URL on the world wide web, just like a street address.
A domain name also puts you in the same online marketplace as other, more experienced companies. It also lets your customers know that you’re not cutting any corners when it comes to operating your business online.
#2: Choose a reliable CMS
After choosing a memorable domain name, choose a content management system (CMS) that best suits your budget, coding experience, availability, and business needs.
In other words, figure out how much time and money you have to:
- Manage content
- Learn to code
- Hire a web dev (full-time or project-based employment)
Remember, if you commission a freelance dev to build your business website, you will have to maintain and manage it.
In this case, you have two options to choose from:
- Low-code or no-code CMS: best for small businesses and professionals on a budget with little to no coding experience.
- Complex code CMS: best for businesses with a team of devs or professionals with programming expertise.
Below, you’ll find three CMS examples that require either no-code or low-code experience to be used successfully.
CMS #1: Webflow
Webflow is a no-code visual, canvas-based website building platform developed for teams with no experience in web development.

Webflow features a great content management tool for creating cool websites at scale without writing a single line of code.
Plus, this platform enables users to:
- Create designs for memorable user experiences
- Use responsive website templates
- Manage eCommerce stores with ease
- Leverage search engine optimization (SEO) without the help of devs
Webflow is great for businesses that don’t have the budget to hire web devs or teams of designers. It’s also good for anyone without coding experience who wants to build a website with as little effort and resources as possible.
CMS #2: WordPress
WordPress is an open-source CMS that features a template system for easy website building and maintenance.

It’s among the most popular website builders available today, accounting for more than 40% of the websites you see online.
Although WordPress offers multiple beginner-friendly web development tools, users need to be somewhat familiar with HTML, CSS, and PHP to implement more complex changes to web designs.
WordPress features multiple capabilities, including:
- Content publishing tools
- User and media management
- Plugins and widgets for a wide range of purposes (e.g., SEO, social media, calendars, etc.)
- Theme and templates
CMS #3: Ghost
Ghost is another open-source publishing system. It enables users to create and monetize blogs, newsletters, and other types of online publications.
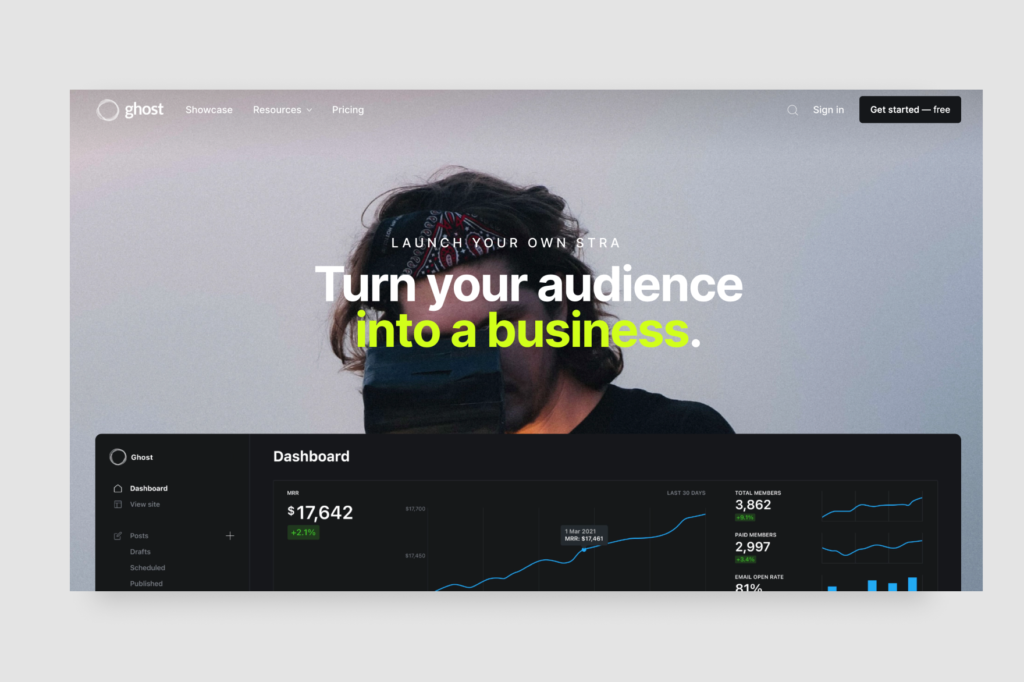
Moreover, Ghost is a great tool for building email lists thanks to its built-in member sign-up feature.
Other prominent features include:
- Markdown support and custom markdown cards
- Royalty-free image library
- Custom HTML cards
- No-plugin SEO features
- Themes and templates (HTML and CSS knowledge needed)
#3: Implement SEO techniques
Search engine optimization (SEO) is what puts your website on your target audience’s radar.
Specifically, an SEO-optimized website has increased online visibility that drives new visitors to the website. New visitors mean new potential customers, so SEO has a great say in your sales numbers.
Consequently, since SEO can impact your site’s performance (and ultimately, your revenue), websites need a solid SEO strategy across:
- On-Page SEO
- Off-Page SEO
- Technical SEO
Element #1: On-page SEO
On-page SEO or (on-site SEO) is the practice of optimizing the website elements visible to a user.
Most people think it’s enough to sprinkle the right keywords throughout their content and images on a webpage. However, this will not help it rank in search results. But there’s more to on-page SEO than just keywords.
Namely, a good on-page SEO strategy should also reflect on elements such as:
Title tags
Make sure each of your blog posts has H1 title tags in their HTML (<h1>Your blog title</h1>). Having H1 tags helps search engines better understand the structure of your site’s web pages.
You should also always include your targeted keywords in your titles. This helps both users and search engines tell what your page is about right from the start.
Headings
Heading tags are important elements for your on-page SEO strategy. They help users easily navigate through your web pages and get to the topic of interest faster.
In other words, headings help you boost your website’s usability.
At the same time, heading tags help search engines evaluate your content. They also crawl relevant information for search queries related to your targeted keywords.
The content (copywriting)
Write for your audience first and then go over your content one more time and make the necessary SEO-related tweaks.
Not the other way around.
You have to keep in mind that, ultimately, people are the ones who will read your content. If your content is not providing value, does not answer common questions, and lacks substance, readers will not be satisfied.
Bad content results in a high bounce rate, which reflects the negative experience users are having when visiting your website.
To avoid disappointing readers, you should:
- Cover topics thoroughly
- Bring original contributions and opinions (don’t just rewrite existing content from other sources)
- Keep sentences short
- Ensure the content is easy to read and understand
After writing your piece, go over it again. Pay attention to the keywords you’ve used and how often you’ve used them.
Make sure you’re mentioning the target keyword enough throughout the page’s content so search engines can determine what your page is really about.
However, be careful not to overstuff your content with keywords—that can be detrimental to your ranking.
Meta descriptions
Adding description meta tags (<meta name=”description” content=”your meta description text”>) to your pages is among the Google-recommended SEO best practices.
Meta descriptions summarize your content on a specific page. They help search engines get a quick overview of what the page is about.
Images
To optimize your images for SEO, ensure that they are not increasing your site’s loading time. You can use high-quality compressed images to keep your loading time low.
You should also include keywords in your image names and add relevant alt text to all of your images.
All these elements contribute to a frictionless user experience—which you should always make your top priority.
Element #2: Off-page SEO
Off-page SEO refers to actions taken outside of a website to impact its rankings. These actions can include internal links, backlinks, social media, etc.
Internal links. Linking to other pages on your site that cover related topics can help you keep readers on your website. Plus, it can help you boost the authority of the pages you’re linking to. Make sure you redirect any broken links, as these are detrimental to both UX and SEO.
Backlinks. Backlinking refers to having other websites link to your content, which might drive traffic your way. Another benefit of backlinking is that it increases your website’s authority.
Social media. Sharing your posts on social media channels helps you increase the exposure your content gets. This can signal to search engines that your content is valuable and worth reading.
Element #3: Technical SEO
Technical SEO refers to website and server optimizations that help search engine spiders crawl and index a site more effectively.
Key things to check here are loading speeds, robots.txt files, XML sitemaps, canonical tags, and more.
#4: Pay attention to web design
A well-designed, easy-to-navigate website can help you make a good first impression. It’s all about providing the best user experience.
A webpage is like a canvas for a designer. They use their abilities to draw attention to colorful areas, build forms, and promote the product. This all drives people toward certain text or images.
For example, a favicon or arrow pointing at the text might highlight CTAs or assist users with discovering interactive content.
To pick the right web design, start by researching the types of websites your target market enjoys. Then, check that you have all the information readers may be looking for in high-visibility places on your site. Think homepage, blog header, footer, etc.
You should also ensure that contact details, service or product offerings, and an “About” page for your business are easy to find as well.
Tip: Speed up the process with proofing tools
When designing your website, designers can streamline their workflow with artwork approval software tools, such as MarkUp.io.
Approval and proofing platforms help with:
- Minimizing feedback loops
- Cutting down on time to sign off
- Eliminating the need for live Zoom calls and long email feedback threads
Designers can create MarkUps from a wide range of file formats, including JPG, JPEG, PNG, GIF, PSD, EPS, AO, TIFF, SVG, and BMP. This range of file types allows designers to seek review on everything from simple graphics to full-scale mockups.
To create a MarkUp, simply drag and drop your design into your MarkUp.io workspace. The platform will automatically create a virtual copy of the respective file.

As soon as your MarkUp is created, you can start adding notes to it in the form of comments. These you can pin contextually, anywhere on your design.
Moreover, MarkUp.io enables users to record their comments in a video format using the Loom integration. The video you record using Loom is then attached to your comment as a clickable link. This feature helps you get your point across faster without having to explain your feedback or remarks in writing.

The best part? Artwork approval software lets you share designs without worrying about file types.
For instance, MarkUp.io lets you share MarkUps via links. These are used by your team, reviewers, clients, and key stakeholders, who open the link in their browser to proof.

No need to install anything on your computer for this to work. MarkUp.io is a web-based software solution that you can use from any internet browser you prefer.
Since you can never be too careful when it comes to customer-facing design, run another round of proofing once live.
For that, you can use the MarkUp.io Chrome extension. It helps you create MarkUps of live websites with the simplicity of creating a bookmark.
So you’ve got your SEO and web design in check. In your opinion, things look great and everything should go as planned.
But will it?
Measure your site’s performance to ensure you’re not missing anything and your visual and written content is effective.
#5: Set up analytics software
Every brand should know how visitors engage with their content and how the site is functioning.
This is why analytics platforms like Google Analytics and CMS analytics must be monitored.
Tracking and analyzing relevant KPIs will give you valuable insights into:
- The ROI of digital marketing campaigns and SEO efforts
- The types of content your audience prefers
- User experience and customer behavior (what users do when they visit your website)
- Device functionality
So, it’s important to figure out which metrics you want to keep track of before launching your website.
You’ll have data from day one and can make data-driven improvements immediately.
Some of the most important metrics that can help you see whether you’re running a successful website or not include:
- Page load speed (how fast your pages are loading)
- Bounce rate (how fast your visitors leave after accessing a page on your website)
- The number of pages users read per session
- The total number of visitors your website gets
- The traffic source to see where visitors come from (i.e., social media, organic search, backlinks, etc.)
- Keyword rankings
- Conversion rates (how many visitors click on your CTA; i.e., how many people submit for your emailing list, purchase your product, give you a call, etc.)
#6: Optimize for mobile
Due to the surge of mobile visitors, a responsive, mobile-friendly website is necessary.
Mobile-friendly websites easily adjust to smaller screen sizes and have a simplified design for mobile users. Mobile web pages feature bigger navigation buttons, smaller pictures (or none), etc.
Ensuring your website is mobile-optimized is essential as mobile web traffic is constantly on the rise.
This increase in mobile internet use is happening partly because of developing digital markets’ lack of infrastructure and/or financial constraints.
COVID-19 has also accelerated how we communicate and use the internet, making mobile devices people’s favorite web-browsing devices.
Considering people’s preference for mobile devices, make sure your website is great on desktop and mobile.
When testing your website to see if mobile navigation is smooth, make sure that:
- Your content looks good on different devices (i.e., smartphones, tablets, etc.)
- Content formatting, spacing, and padding are displayed well
- Images load fast and are displayed correctly
- Page scrolling works properly
- Buttons, menus, and popups are responsive
- Your website loads correctly in different internet browsers
#7: Test usability
The main objective of testing different website functionalities is to ensure your design is intuitive and easy to use.
After testing everything in-house, get an unbiased opinion from representative users. How? Observe them as they complete certain actions on your site.
Usability testing is a crucial step before your new website launches. 9 times out of ten, ease of use is cited as a differentiating factor between similar websites.
Think of it this way. Two websites are offering the same information. However, one of them is hard to navigate. Predictably, users choose to use the website that provides a smooth user experience (UX).
So, what makes a website easy to navigate?
Put simply, usability depends on things like:
- Learnability: how fast users can learn how to utilize a site
- Intuitiveness: how easy it is for users to perform certain tasks without instructions
- Efficiency: how quickly and effortlessly a user can perform a task once they learn how to do it
- Memorability: how well a user can remember to perform a task after they’ve not used your site for a while
- Enjoyability: asking users if they have a pleasant experience when navigating your website
- Bugs: users going through different processes on your website and trying to identify errors
To ask users to rank your website based on the above-mentioned criteria, create different scenarios for users to follow.
You could ask your test group to log in, submit a contact form, go to different pages (i.e., Blog), or do other tasks.
While the focus group is going through the tasks, jot down any complaints, suggestions, or remarks people make.
#8: Check security
Ensuring a website is secure is another important step for people to keep in mind before launch day.
Not only will you keep your data safe, but you will also have a better chance at ranking. For example, Google confirmed that the search ranking algorithms account for website security.
So, it’s essential to keep a website safe for the overall performance of your site. To do so, you can:
Invest in an SSL certificate
You’ve probably already seen that most URLs today start with “HTTPS”, where the “s” stands for “secure”. Websites that have an HTTPS URL use a Secure Sockets Layer (SSL) or Transport Layer Security (TLS) certificate that ensures a secure connection to the site.
Use anti-malware programs
Anti-malware software keeps site security in check by detecting and removing malware, running a web firewall, patching vulnerabilities, and more.
Run regular backups
Even if you have implemented a comprehensive website security solution, nothing can guarantee that attacks won’t slip through the cracks.
Backing up your website data regularly helps you prepare for worst-case scenarios and quickly recover if a possible breach occurs.
#9: Optimize for lead generation
It’s important for websites to be optimized to convert users into paid customers.
Depending on your goal, you can generate leads through email sign-up forms, clear CTAs, and a smooth user journey.
Generally, what generates leads on a website is the “call to action” (CTA) button. After clicking the CTA, visitors are redirected to a landing page. They usually need to fill out and submit a form with their contact information.
Great conversion rates are made with carefully thought-out design and copywriting text.
For instance, if you want to have a CTA button that stands out, you could use bright colors to highlight it and a snappy and catchy phrase to convince your readers to click the button.
Let’s say you want your readers to sign up for a newsletter. To encourage people to subscribe, place a CTA button at the end of a relevant blog post (i.e., an article about the importance of email marketing).
After clicking the CTA, they will arrive at a landing page explaining the benefits associated with reading your newsletter. On the same page, you should place a subscription form for the reader to use to subscribe.
Once the reader subscribes, they’re added to your email list and are considered leads from this point on.
#10: Check for bugs
It’s important for developers to look for potential bugs in website code and solve them before the website goes live.
This is usually done during the quality assurance (QA) phase when designated professionals thoroughly test a website’s functionality.
Anything that doesn’t work as intended is called a “bug” (i.e., a button that doesn’t do anything).
The bugs are documented and sent to the developers to be fixed.
To simplify the debugging process, you can integrate annotation tools into your workflow.
For example, MarkUp.io helps developers quickly share their thoughts on the user interface during QA and anything else disrupting UX.
With MarkUp.io, QA engineers can create MarkUps of the website and pin comments to the elements that don’t function properly.
On the other hand, developers can see the comments in real-time and simultaneously resolve the highlighted issues.
Using annotation tools can help your team get more done faster, and with less friction and frustration.
#11: Choose a launch date
Your site has been debugged, your user group is happy, security is in check, SEO best practices are followed, and everything else is seemingly falling into place.
Now what?
It’s time to choose a launch date! You’ve officially completed the website launch checklist and are finally over the hardest part of the website development process.
🎉
Chances are the project might be a bit overdue and the initial project timeline is not a valid reference.
This is why it’s crucial to establish a new launch date after completing the project.
A new launch date will help you ensure your team members are aligned and informed about the updated project timeline.
Everyone will have their part done in time, and users will know when to expect the website to go live.
When choosing the launch date, take into account:
Seasonal happenings and events. It’s best to avoid launching around major holidays unless your product or service might be useful for consumers at that time of year. Therefore, research any seasonal and religious holidays that might impact your audience’s response to the launch.
Day of the week. As a general rule, stick to business days. Avoid launches during the weekend, when consumers usually unwind and engage in leisure activities away from technology. Research shows that the best day of the week for launches is Tuesday.
Time zone. When setting a launch time, it’s crucial to account for your audience’s time zone—especially when you’re a global business. So, make sure your launch is not happening at 1 AM in your customers’ time zone. Then spread the word internally and socially to make sure everyone is ready for the big launch.
#12: Promote your website
Website promotion should be an integral part of your launch and post-launch strategy. Why? It can help you boost website traffic and increase awareness of your brand.
When choosing a social media platform to promote your new site, keep your target audience in mind. Look at each platform’s demographics and figure out which one aligns with your audience.
For instance, if you’re offering B2B services, LinkedIn is the way to go. If your target audience is younger than 25, you might want to consider TikTok.
If you already have an email list of people interested in your business, spread the word through a newsletter campaign.
Or, create a referral program with cool incentives that will motivate people to recommend your service to friends and family.
Referral marketing works wonders! How do you think PayPal became so popular?
PayPal’s referral program helped the company get 1 million users in the first two years on the market! Six years later, they reached 100 million users, and the platform is still growing to this day.
How did they do it?
They implemented a double-sided reward program. It offered incentives to people who invited their friends to join the platform and new users accepting their friends’ invitations.
A press release is also a great way to spread the news about your launch.
Find what works for your niche and keep doing it until you’re satisfied with your organic web presence—and even afterward!
There’s always room for improvement, right?
Now over to you
Speaking of improvement…
Launch day is around the corner and there is no need for you to be tense. We’re here for you.
MarkUp.io can help you stick to the project timeline by streamlining the QA process, web and graphic design approval workflow, and content proofing operations.
Sign up with MarkUp.io for a headache-free website launch. 😊