
In today’s digital era, graphic design is no longer an option – it’s indispensable. If you want your brand to create a lasting impression, graphic design is the best place to start.
Creating a graphic design is pretty much like baking a cake. You can’t just add all the ingredients together at once and expect it to grow into the most delicious dessert.
You need a solid workflow that supports your creativity and adds value to each process step.
This guide will provide step-by-step instructions on creating a graphic design workflow that streamlines your day-to-day operations and keeps your work consistent.
Let’s get into it!
Table of contents
- What is a graphic design workflow, and why do you need one?
- How to optimize your graphic design workflow in 8 essential steps
- Pro tips for an optimized graphic design workflow
- The importance and benefits of a graphic design workflow process
What is a graphic design workflow, and why do you need one?
Let’s go back to our cake example. If you throw in all the ingredients immediately, you’ll have a bloated, disgusting mess.
Similarly, taking on a graphic design project without a process can result in a bloated workflow filled with endless revisions and unnecessary steps.
A graphic design workflow is the standardized process of creating a static visual project from start to finish. It involves planning, designing, and executing the project in an organized and efficient manner in a repeatable way.
Simply put, it’s a step-by-step plan that offers designers a strategic process they can rely on whenever starting a new project.
Not only does it simplify things, but a well-defined workflow also helps ensure that all aspects of the project are completed on time and within budget.
Now you might be wondering, do I really need a graphic design workflow?
If you want to create professional-looking graphics every time, then yes, you do need a workflow. A solid strategy to keep work consistent and well-organized is part of every successful graphic designer’s routine.
However, not just any workflow will benefit your graphic design project.
The wrong workflow can be detrimental, slow your creative process, and ultimately hurt your reputation. 👀
What you need is an optimized graphic design workflow that supports your efforts and streamlines your operations. Here’s how to create one in eight easy steps.
How to optimize your graphic design workflow in 8 essential steps
While every company or designer has their own personalized design workflow, having a framework of do’s and don’ts will speed up your day-to-day operations.
Whether you’re working with design software like Adobe Photoshop or using Canva to craft your designs, these eight essential steps are a must for optimizing your graphic design workflow.
Step #1: Analyze the brief and project goals
Getting to know your client (aka the “discovery” phase) often differentiates between a successful design project and a failed one. After all, why bother if you don’t deliver what’s expected of you?
Investing your time and efforts to understand your client’s needs and expectations will also make your project much easier to complete.
So, before you let your creative design juices flow, listen to your client, analyze the creative brief they’ve provided, and ask questions if something’s unclear.
Another helpful strategy is to design your own design brief template based on previous projects and specific details to help you understand the project’s scope.
To ensure you remove the back-and-forth, include the following basic elements in your design brief:
- Key project goals and client’s expectations
- Tone and brand voice
- Your client’s target audience
- Important project timelines
- The budget for the project
- Examples of reference designs
Step #2: Conduct the subject research
Your client will provide you with valuable information about what they want from your design project, but you need to go the extra mile if you want to exceed their expectations.
Doing your own research as part of understanding your client’s vision and brand is what differentiates your work from the mainstream. To get there, you’ll have to:
- Analyze their previous design work to familiarize yourself with their vision.
- Look at your client’s competitors to understand the industry, get some inspiration, and avoid creating similar designs.
- Review your client’s brand guidelines, including fonts, color schemes, and other visual elements, to ensure you stay within their brand’s identity.
- Conduct general market research by diving into the graphic design trends impacting your client’s industry. Then, adapt your design strategies accordingly.
- Understand the value and benefits of the product or topic you’re promoting.
Step #3: Brainstorm ideas and create a mood board
By completing steps one and two, you’ll know the direction your graphic design project should take to meet the needs of your clients and their audiences.
Step three is about brainstorming ideas to make it happen and creating a mood board to visualize them.
Brainstorming is an essential part of the graphic design process. It’s a creative exercise that helps you develop ideas, explore different concepts, and find inspiration for your project. It’s like professional daydreaming! 😌
As fun as brainstorming can be, remember to be strategic. For instance, how much time is too much time where a brainstorming session is concerned?
Like most things, that depends. A good rhythm to get into is to take regular breaks, mix up your brainstorming process with other tasks, and return to your ideas with a fresh mind.
This way, you’ll likely generate more original ideas, and your vision will expand to include multiple perspectives.
And If you are part of a design team or collaborate with other professionals, you’ll likely have more ideas and different perspectives.
The beauty of group brainstorming is that it demonstrates how well people’s differences and diverse thought processes can work together.
Do you know what else goes well together? Brainstorming and mood boards. 🔥
A mood board is a collection of images, colors, textures, fonts, and other visual elements that represent the overall look and feel of your design project.
Further, mood boards help you visualize (and present) your ideas more clearly. You can combine different elements by seeing how they mix up, easily switch them around, and change what doesn’t fit. Create your mood board with the client’s needs and expectations, but add your personal, original touch to it.
Step #4: Create drafts, sketches, and outlines
Let’s recap your graphic design workflow so far:
1. You’ve studied the creative brief provided by the client and learned about the project’s scope and what’s expected of you.
2. You’ve done your own research to understand your client’s brand, vision, and the market trends influencing their industry.
3. You’ve brainstormed design ideas, created original perspectives, and visualized and mixed them up on a mood board.
Congrats, you’re halfway through your graphic design project! 🎉
The second part of your workflow involves putting everything you’ve created in the first part on paper (digital or not).
This stage of your graphic design workflow includes creating sketches, outlines, and drafts, either on paper or on a device. Some designers would rather sketch by hand to avoid distractions, but you know what works best for you.
Whether you’re doing them by hand or digitally, create multiple versions of your design deliverable while exploring different perspectives.
Don’t worry about being perfect at this point, just let your creativity run the show—you’ll have plenty of time to polish your work in the following project stages.
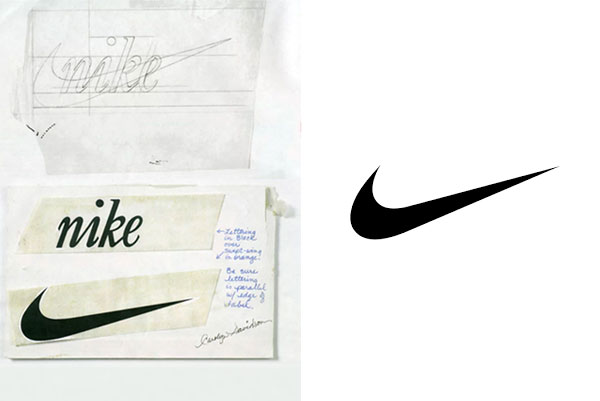
Just like the story behind Nike’s logo!
In 1971, the founder of Nike, Phil Knight, asked a design student, Carolyn Davidson, to create an image that could go on the side of the shoe.
He paid Davidson $35 for the logo design.
Knight revealed that he didn’t love the logo but that it was good enough to use, so he did. Today, Nike’s logo is one of the most famous in the world.
Step #5: Revise drafts based on client feedback
Many graphic designers loathe this step. And, yes, client feedback can be one of the most frustrating parts of a graphic design workflow.
Frustrating because it involves a lot of back and forth, time-consuming meetings, and misunderstood conversations.
On top of this, if you don’t have a good relationship with criticism, your client telling you what you did wrong could damage your self-esteem.
However, it’s vital that you don’t take feedback personally and approach the situation with curiosity—what can I learn from this? How can I improve my work so that it won’t happen again?
Once again, let’s revisit the cake analogy.
If your guests told you your cake should taste less sweet or have more chocolate, you wouldn’t take that personally, would you? Instead, you’ll probably note this and be more careful with the sugar next time.
You can, of course, assess if the feedback you receive is constructive and if the changes are doable within the discussed timeframe. Otherwise, don’t hesitate to establish boundaries, have extra meetings with your client, and clearly state your professional point of view.
Best-in-class graphic designers use the feedback stage as a growth opportunity. They note the lessons they’ve learned and what they could’ve done better so they can grow with each project they create.
Sometimes, it’s important to put yourself in your client’s shoes. The feedback process can be a frustrating one for them, as well. They might feel misunderstood, that revision drafts take too long, or that they waste valuable time.
To avoid frustration on both sides, a better way to collaborate, receive feedback on your drafts, and cut down review loops is with MarkUp.io.
With MarkUp.io, you can use visual feedback for your graphic design projects to save time and frustration.
Just drag and drop your graphic design drafts onto your Workspace and share it with your clients and team to streamline the feedback process.
Step #6: Develop and refine the final design
With the feedback stage simplified, you gain more resources to refine the last design. This is what you’ve been researching, brainstorming, and designing for.
Things to keep in mind at this point:
- The holy brief. Your finished product must tick all boxes on your client’s brief and deliver to those goals and expectations.
- Your client’s feedback. Make sure to implement all the edits discussed in the feedback stage. Remember, you don’t have to love the design. Your aim should be to impress your client and deliver the results they desire, regardless of your personal preferences.
- Polish your design to perfection. There are many top-notch graphic designers out there. The digital era has made this field competitive and raised design standards. So, if you want to keep up, ensure your final product is flawless. Triple-check your composition, balance, alignment, contrast, fonts, resolution, and other design elements before delivering your project (MarkUp.io hack: revisit all resolved comments one last time to ensure you’ve implemented every change clients have asked for).
- Don’t experiment. The last thing you want to do at this stage is to come up with new ideas. Your client has already agreed on a particular design they like, so don’t waste their time with more experiments. Although it may be tempting, and your creative side might get triggered, stick to what you’ve already discussed with your client.
Step #7: Get a sign-off from stakeholders
You might think that delivering the last design will end your graphic design workflow. Although you’re close to the finish line, you still have two more steps.
First, your design needs approval from your stakeholders before it goes live. This might be tricky if multiple departments need to sign off. Your stakeholders might live in different time zones, which can further slow the approval process.
The good news is that a platform like MarkUp.io can streamline your review-and-approval process.
With MarkUp.io, you can:
- Exchange clear, contextual, real-time feedback.
- Comment on anything—the platform supports over 30 file types like websites, images, PDFs, and videos.
- Cut down review loops and enable your team to bring the best to the table.
Step #8: Conduct user-test feedback
The approval that will matter the most for the success of your design project is the users’ and customers’ approval. If you make them happy, your stakeholders and clients will be happy, and guess who else?
User testing brings plenty of benefits to a graphic design workflow, including:
- Uncovering key pain points that were unforeseen in the design phase.
- Helping you understand user needs and how they interact with the product.
- Improving your odds of creating the best design possible.
- Building a pathway to constant user feedback.
You can get customers to leave feedback on your design by either reaching out to them or running focus groups.
For smaller companies with loyal users, asking for feedback on social media, for example, should probably be enough. Bigger organizations, however, might need focus groups to invite people to leave feedback on new designs.
Getting feedback about your design from real users is the last step of your graphic design workflow. By now, you should be familiar with what it takes to build outstanding designs that impact audiences.
However, regardless of your experience level, graphic design takes time and effort.
Below are some pro strategies for speeding up everyday design tasks so that you can work smarter, not harder.
Pro tips for an optimized graphic design workflow
When optimizing your graphic design workflow, the most important step is ensuring that the brief you receive from your client has all the right information.
A well-crafted brief should include details about the project’s purpose, target audience, budget, timeline, and other relevant information.
A clear understanding of your client’s needs will help you save time in the long run.
✅ Create your schedule and stick to it
Studies show that people reach their productivity peaks between 9 am and noon. If that sounds like you, create a morning work schedule for your design project to maximize productivity.
If not, choose another time that works best for you. The more you stick to an organized schedule, the more it will show in the project outcome.
✅ Set a clear task list and prioritize
Effective prioritization is a top time-management skill. However, few master it.
Believe it or not, people spend 80% of their time doing little- to no-value tasks and only 20% on important ones.
A well-optimized graphic design workflow requires clear task prioritization to meet deadlines and stay on track.
Set a clear task list and prioritize the most important tasks first.
✅ Use project management software
Project management software can be a great tool for streamlining your graphic design workflow. It helps you keep track of tasks, deadlines, and progress.
Project management software also allows you to assign tasks to team members, set reminders for upcoming deadlines, and store all the necessary information in one place.
This way, everyone on the team is on the same page and can easily access important documents and files.
✅ Organize your work folders
Another time-saving tip is to organize your work folders. Having a clear folder structure will make it easier to find the files you need quickly.
Create separate folders for each project and subfolders for different project stages, such as research, drafts, mockups, final designs, etc. This way, you can easily access the files you need and keep your workflow running smoothly.
***
That’s a lot of steps, tips, and information, right?
All this work might seem overwhelming, and you may question whether it’s even worth it. Well, if you still aren’t convinced of the benefits of following a
well-organized graphic design workflow, here are some insights to help you decide.
The importance and benefits of a graphic design workflow process
Creating an effective graphic design workflow by using an agile methodology generates multiple benefits, including:
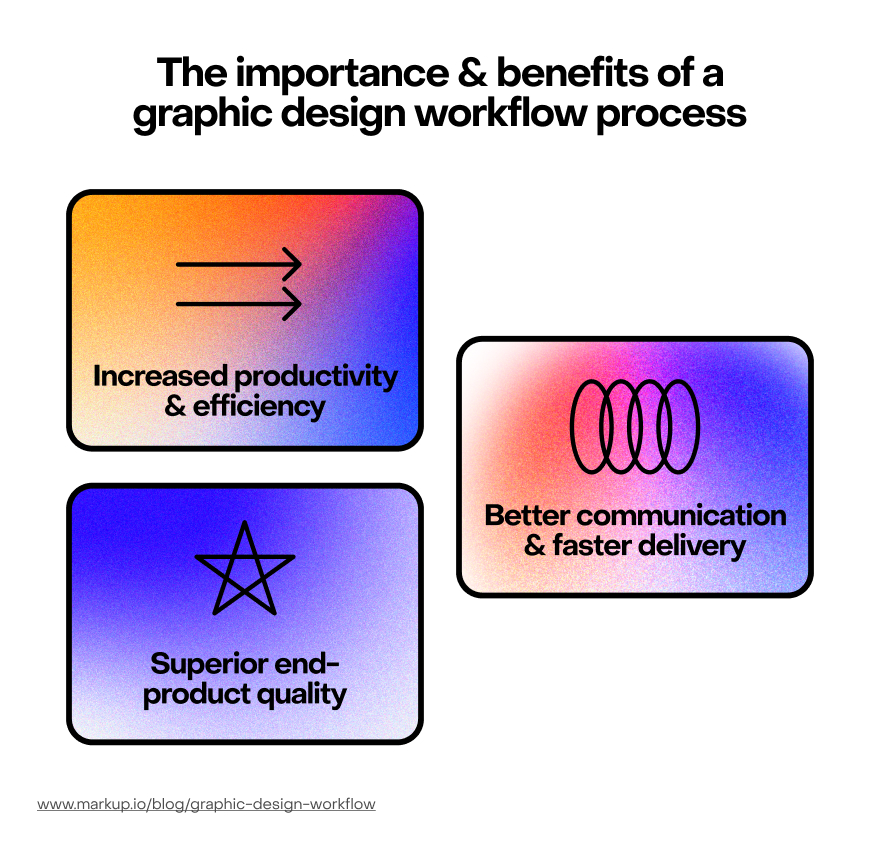
Benefit #1: Boost in efficiency and productivity
An optimized design workflow reduces the waste of valuable resources like time and effort, thus increasing productivity and efficiency.
Benefit#2: Process stays organized
A well-structured workflow allows better communication between team members, clients, and stakeholders.
Benefit #3: Superior end-product quality
By following a structured design process, you can ensure that you’ll create high-quality designs that meet the client’s needs.
Over to you
Baking a cake that people’s taste buds will remember takes time and dedication. Similarly, a lot goes into creating high-quality graphic designs that resonate and speak up for brands.
A design workflow brings a lot to the table and can consume your resources considerably. However, with the information in this article and the right tools at your fingertips, the process can become more streamlined and open the door to creativity.
MarkUp.io can help you focus on what matters most—your customers. By transforming your review and feedback process from a dreadful experience to a seamless operation, MarkUp.io becomes a trustworthy partner. Claim your 30-day free trial with MarkUp.io and start getting feedback on your next successful project.