
You’ve spent hours designing a stunning user interface in Figma.
The colors, typography, and layout are all perfect. 🤌
There’s only one thing left before publishing your creation – getting your stakeholders’ approval.
So how do you export your masterpiece without compromising its quality?
Sure, you can invite stakeholders to collaborate on your design, but that increases the chances of someone unfamiliar with Figma messing it up.
If you’ve already started taking screenshots of your design and emailing them to stakeholders, this blog is for you.
We’ll walk you through everything you need about exporting from Figma like a pro.
Let’s dive right in!
Table of contents
Figma export use cases
You might not need to export your Figma file if you plan to use it only within the tool.
However, there are several cases where you might have to export the file.
Scenarios like…
Scenario #1: Sending files for review
Figma allows users to invite reviewers to view or edit a design. However, we get why you’d prefer downloading your project or prototypes and sharing them with stakeholders in a different way.
Perhaps you don’t want anybody snooping around, checking details like properties, CSS/HTML code, or the size of specific elements.
Fortunately, Figma does offer view and edit permissions (which you can learn more about from our guide on how to use Figma).
When working with people unfamiliar with Figma, it makes more sense to download your designs before sharing them. You can avoid overwhelming stakeholders by sharing the design via easy-to-understand artwork approval software like MarkUp.io.
With MarkUp.io, you can keep your Figma design workspace away from inquiring eyes.
Drag and drop your export assets into your MarkUp.io Workspace, create an Image MarkUp, and send it to whomever you want via:
- Email invite
- Shared link
- MarkUp URL
Reviewers don’t need an account to pin comments to your projects. This, together with MarkUp.io’s close-to-zero learning curve, make it easy to use with any non-tech-savvy stakeholder.
Here’s how easy it is to annotate an image with MarkUp.io!
It only takes a few clicks, and *poof* you get pixel-perfect, in-context feedback pinned right to the elements of your design that need edits.
Plus, it also works for live and staged websites!
Scenario #2: Keeping track of versions
You’re old-fashioned. You prefer to keep your version history on your computer. Who are we to judge?
But if you want to give Figma-native, cloud-based version history a try, here’s what to do:
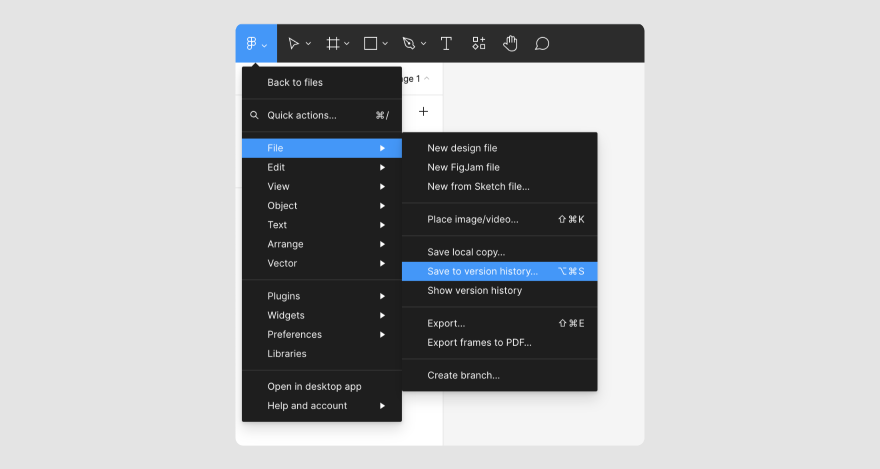
- Create a file version by selecting the
menu in your file. Go to File and click Save to version history. You can also use the shortcut CMD+ Option+S or Ctrl+Alt+S.
- Add a title and description to help you identify the version history.
- Select Save to create a new version.
You can assign a name to an existing version too.
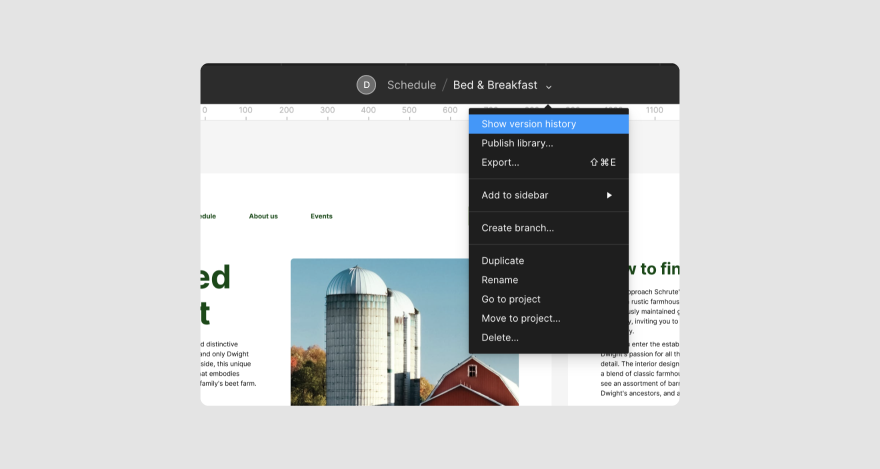
- From the menu at the top bar, click Show version history.
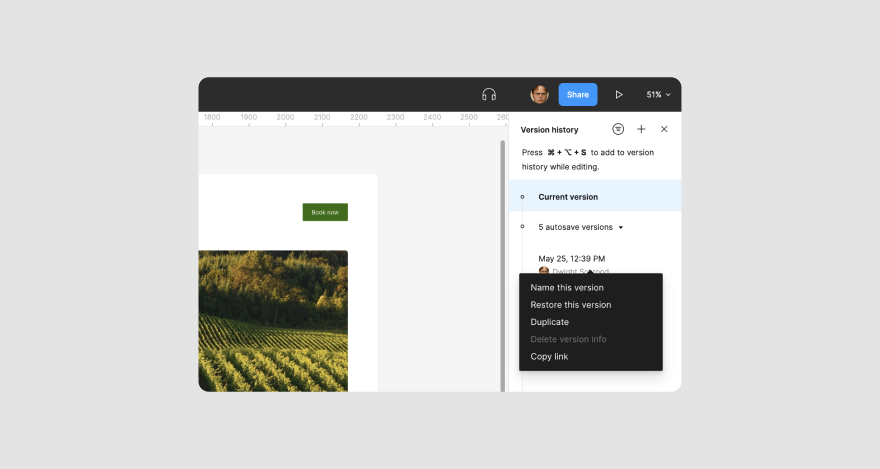
- Select the version you want to access in the right sidebar.
- Select the ellipsis button (…) next to the version and click Name this version.
To view different file versions at their specific date and time, use the page list to see other pages in the file. Then, click and drag to move around the canvas.
Scenario #3: Submitting final drafts for approval
Some of your collaborators are not designers. As a result, they don’t want to sign up for a design tool just to review and approve designs.
Sure, you can set your designs to Public so everyone can see them without having to log in or create an account.
But with this option, you lose the ability to receive visual feedback.
So now what?
You can simply export your Figma files, upload them to MarkUp.io, and share them with the world. No sign-up is needed on the reviewers’ side.
But won’t there be format conflicts between Figma and MarkUp.io?
Do I need to convert the Figma files before creating MarkUps? 😑
Short answer: NO!
Let’s look at the facts.
What export formats does Figma support?
Figma supports exports in four popular formats, so you shouldn’t experience any difficulty in uploading them to MarkUp.io.
They include:
PNG Figma file export
Portable network graphics (PNG) is a bitmap format that’s usually used for preserving high-fidelity images on the internet. The PNG file format is commonly referred to as the lossless bitmap format because it retains the image quality even if it’s compressed.
It’s the preferred format for web and UX/UI designs.
In other words, you can save and export an image ‘as is’ without compromising its quality.
JPG Figma file export
Joint photographic group (JPG) is the popular kid in the file format space, and of course, it’s supported by Figma.
JPG is a pixel-based format with fixed dimensions. This means that compressing a JPG image can result in a low-quality image and file size.
This file format is more widely used in photography than in web designs.
SVG Figma file export
Scalable vector graphics (SVG) is an XML-based vector format. With it, you can enlarge or reduce any element without losing quality or clarity.
Another feature of SVG formats is that they can be represented in scripts or code, allowing a seamless interface for the developer handoff process.
Do keep in mind that on Figma, you can only export SVGs at 1x.
PDF Figma file export
Portable document format (PDF) allows you to customize different elements of a design in multiple systems. PDFs are compatible with any device, software, or operating system.
With PDFs, you can share interactive layouts, such as text, images, vector graphics, fonts, etc., in a fixed layout.
Whatever your image format preference is, MarkUp.io supports all of the above, plus more. For instance, you can create design MarkUps with popular file types like
- Design files: PDF, JPG, JPEG, SVG, PNG, GIF, BMP, PSD, AI
- Text files: TXT, DOC, DOCX, DOCM
- Video files: MP4, MPEG, AVI, WebM, Apple ProRes, MKV, etc.
- Web content: live websites and staged websites
Now there’s one thing standing between you and the review sessions of your dreams. Let’s get the how-to out of the way so you can create your first MarkUp ASAP! 🥳
How to export from Figma in 3 steps
It’s time to show you how to export design files in PNG, JPG, PDF, and SVG formats from Figma.
If you’ve got the Export Original Image Figma plugin, you can simply install the design system and run it to start saving original images.
But if not, here’s how to get started. 🧘
Step #1: Choose what you want to export
Start by selecting the file you want to export from Figma. You can do this by navigating to the Team project within Figma and double-clicking on the file you want to export.
You can either export a specific selection of the design file or export in bulk.
Here’s how to do both.
Export a specific project area
To share a specific project selection, you’ll need to:
- Select the layers to be exported.
- Add or adjust the export setting.
- Click the Export option at the bottom of the right sidebar.
Ta-da! Figma will export only what you’ve selected.
Export multiple assets at once
To export in bulk, you need to use the export list – selections that you’ve added export settings to.
- Click the
menu > File > Export or press Shift+CMD+E on Mac and Shift+CTRL+E on Windows.
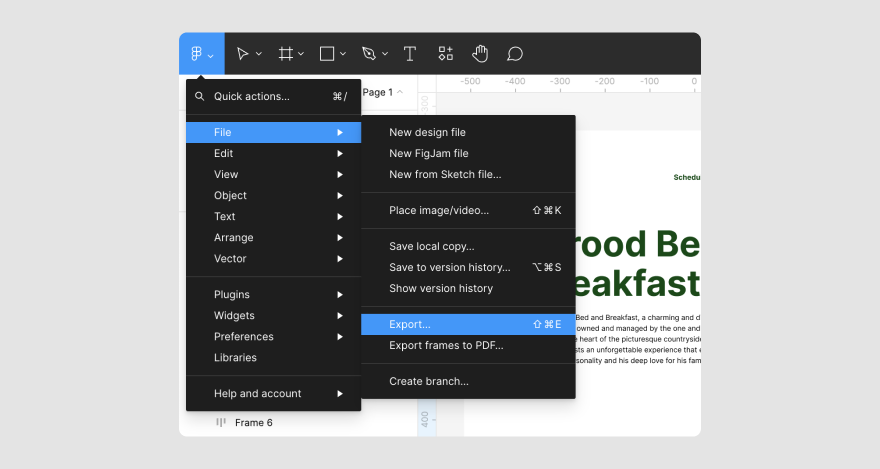
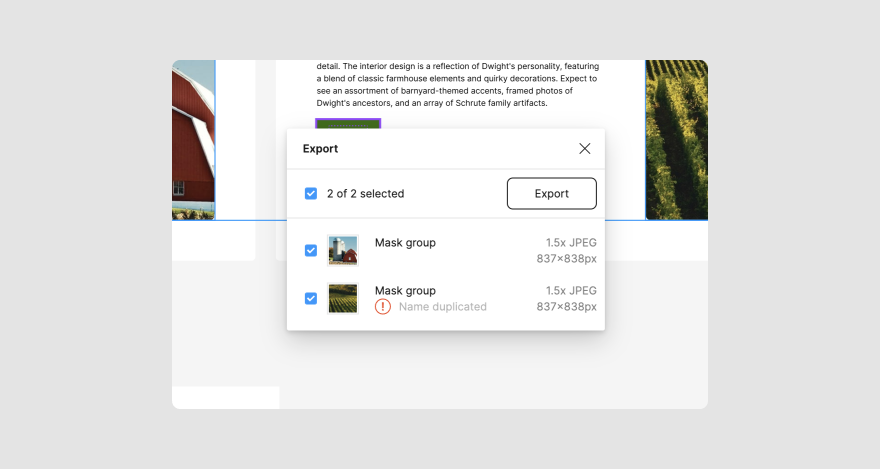
An Export dialog box will appear, showing you the selections you’ve got export settings for.
When done, check the boxes of the selections you want to export and click on the Export button.
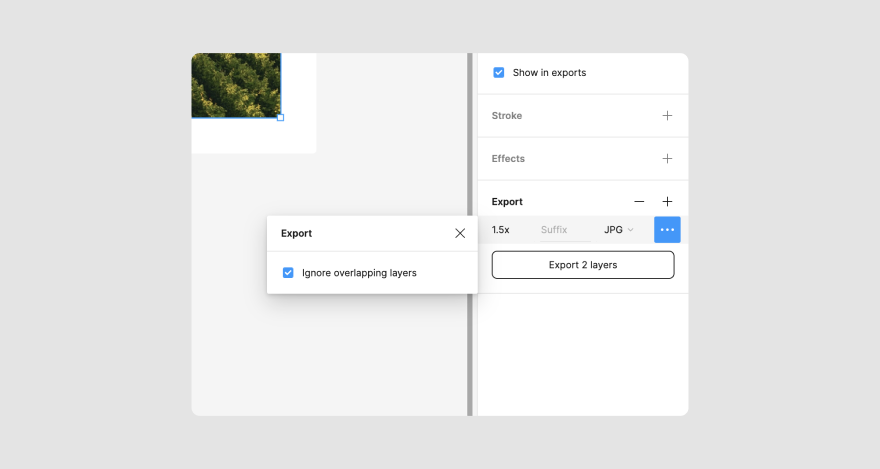
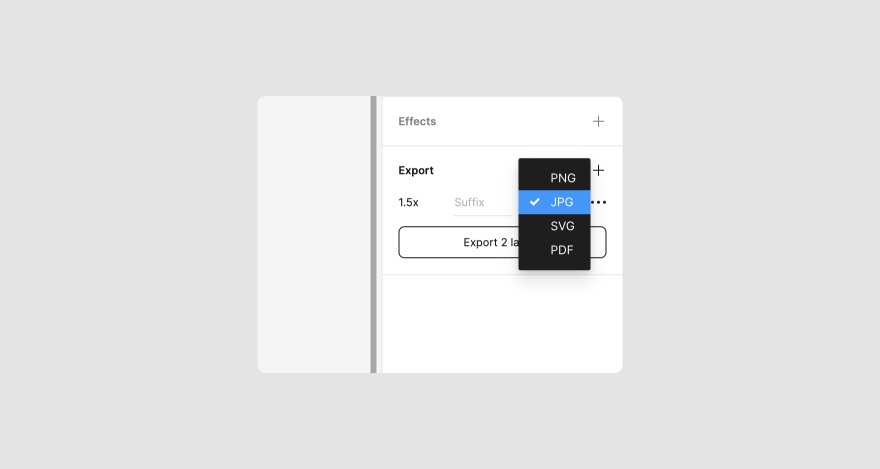
Step #2: Adjust the export settings
After selecting the elements aka Figma frames you’d like to export, head to the Export section at the right sidebar.
Choose the formats (JPG, PNG, PDF, SVG) you want to export your animation, sketch, or designs to.
Depending on your format (PNG or JPG), you can input a custom scale for the exported design.
Step #3: Export your design files
When you’re done adjusting the export settings, click the Export button to export the files from Figma.
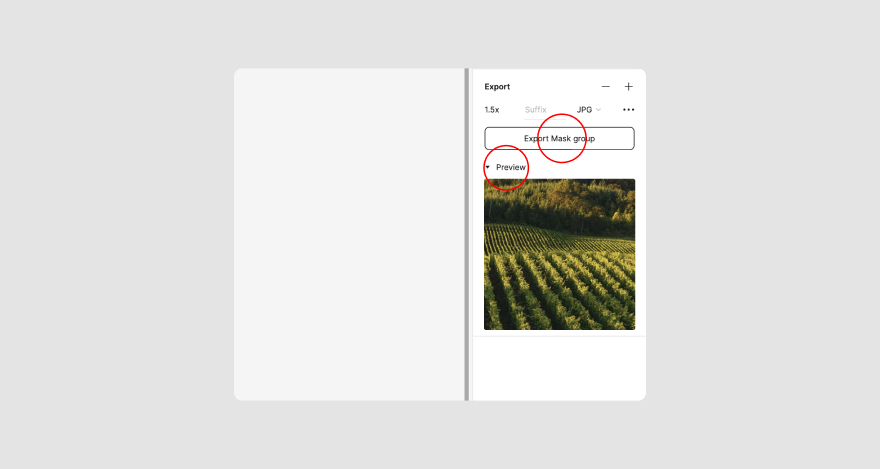
If you’d like to see what the design file will look like in the format and scale you’ve chosen, click the Preview button before clicking Export.
Bonus Step: Add your Figma files to MarkUp.io
We should stop here, but we don’t want to see you going through the stress of attaching exported design files via email or asynchronous communication tools just to request feedback.
You feel the same way, right?
So, here’s how to add the exported Figma files to yours truly, MarkUp.io.
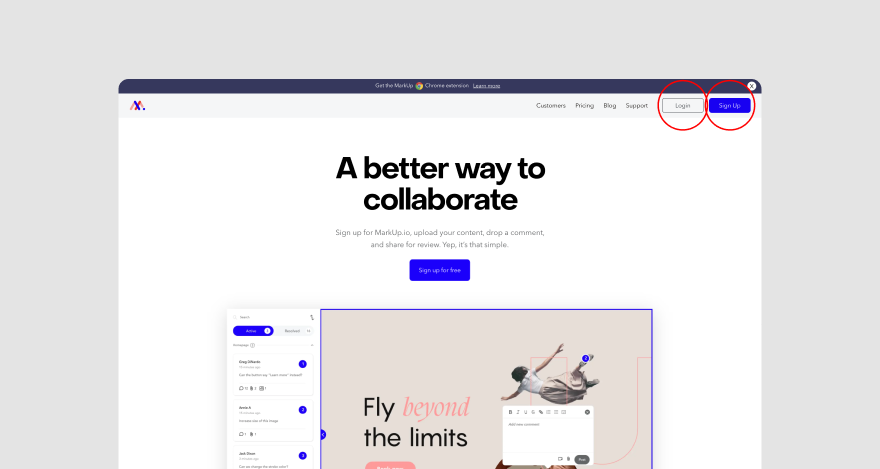
Visit www.markup.io and click the Sign-Up button at the top right corner of the page. If you’re a registered user, select Login.
Once you’ve got access to MarkUp’s Workspace, drag and drop the exported design files to your Workspace or click the Upload button to add the files to create MarkUps.
And now to the fun part – requesting feedback.
To get reviews from teammates or stakeholders, share your MarkUp with them via a link to start collaborating.
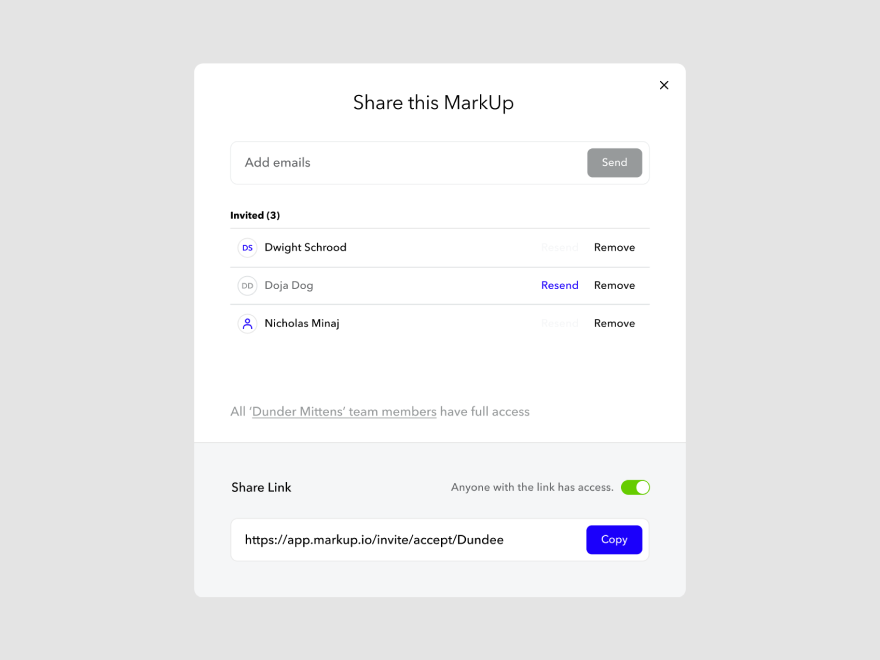
With MarkUp.io, reviewers can click anywhere on the file to add comments and tag you so you’re notified of their annotation.
By the way, they don’t need a MarkUp.io account to provide feedback on the files.
When implementing stakeholder feedback, you can resolve a comment to transfer it to the feedback archive – the Resolved tab – for easy tracking.
***
Guess who just improved their Figma skills?
You did! 🚀
And yes, we’re super proud of you. Just one more thing, and we can tie this up.
Make Figma reviews easier with MarkUp.io
You can do more with your exported design files by integrating MarkUp.io into your current workflow.
MarkUp.io simplifies how you share assets with clients and stakeholders and streamlines how you request and gather feedback, among other things.
It’ll help you minimize endless feedback loops and ensure everyone in the review process is on the same page.
What are you waiting for?
A 30-day free trial awaits when you sign up with MarkUp.io.