
Ah, ‘feedback.’ A word that probably sends shivers down your spine.
Unless, of course, you’re using MarkUp.io! ✨
That’s because anyone who uses the platform knows that MarkUp.io makes feedback–and team collaboration–as easy as pie.
But getting projects over the finish line isn’t just about reviews. It’s about integrating the right tools seamlessly to ensure a smooth workflow from start to finish. 🤌
That’s where this guide comes in. We’re not just talking about how MarkUp.io makes feedback easy. We’re diving deep into how you can optimize your workflow with MarkUp.io, ensuring that your creative team is always at its most efficient and productive.👌
Without further ado, here’s how to add MarkUp.io to your tech ecosystem!
Table of contents
- Streamlining collaborative feedback on video projects 📹
- Improving communication & project management efficiency for marketing teams ✍️
- Simplifying communication and collaboration for design teams 🎨
- Enhance collaborative feedback for CRM web projects 🌐
- Automating tasks & facilitating content reviews for low-code web developers 💻
Streamlining collaborative feedback on video projects 📹
Video editing requires time, patience, and a keen eye for detail. Thankfully, most videographers use tools like Adobe Premiere Pro or Vimeo for the heavy lifting.
But what about gathering real-time feedback?
Enter Video MarkUps.
Simply create a Video MarkUp, share it with your stakeholders, and watch the reviews reel in (pun totally intended 😜).
Now you can address essential feedback first, so your video production process keeps humming along.
Imagine you’re part of an in-house creative team using MarkUp.io for video project reviews. Each video undergoes internal reviews on MarkUp.io, followed by a final review with the stakeholders. The team shares the MarkUp link with the stakeholders and provides instructions for using MarkUp.io. They use Folders labeled ‘in-progress’ and ‘approved’ to track each video’s review stage.
Let’s break that process down.
Tools used with MarkUp.io
Video editing tools: Adobe Premiere Pro and Vimeo.
Communication tools: Slack, Microsoft Teams, and/or email.
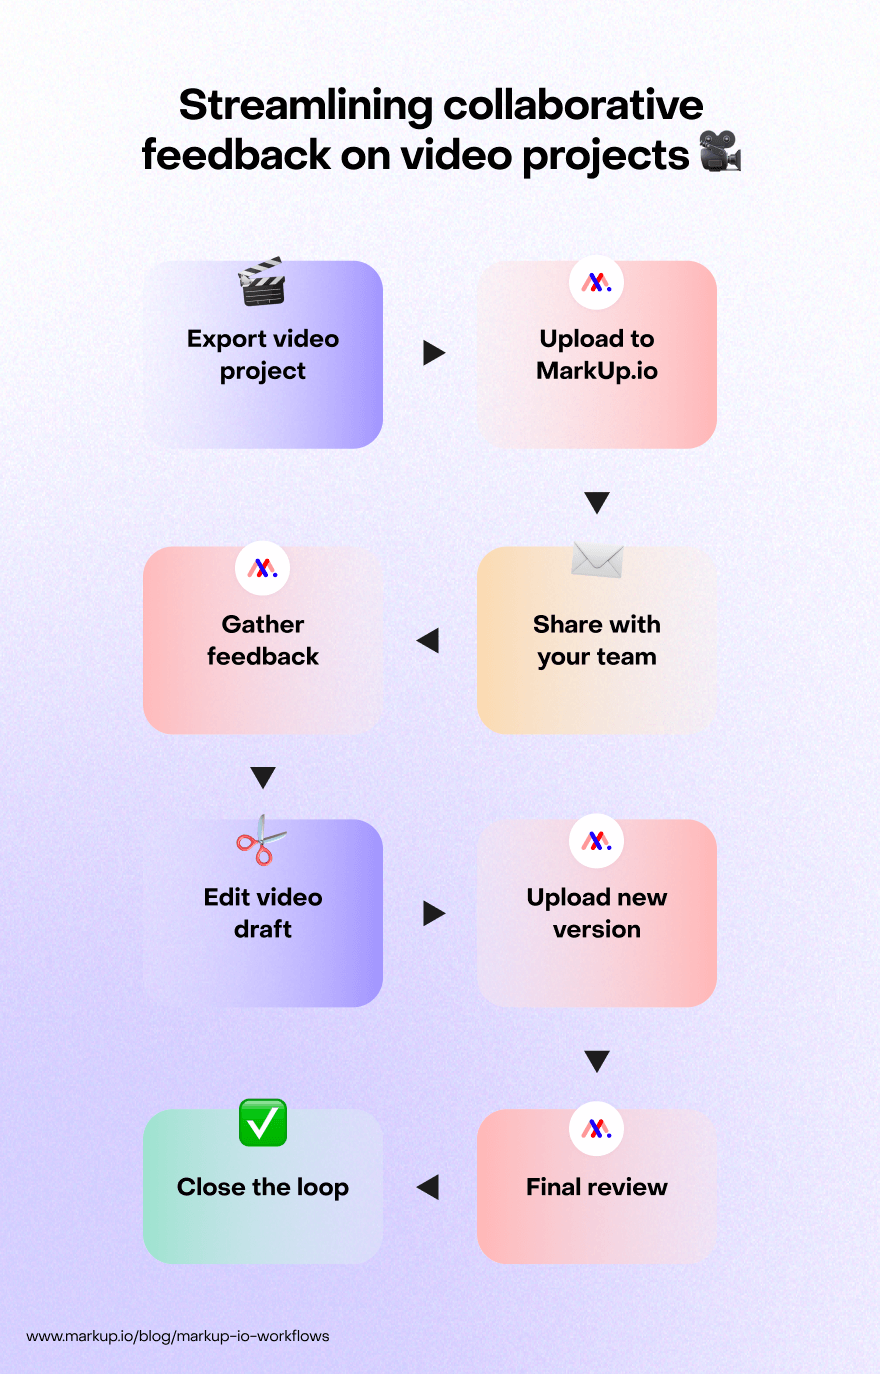
How your tools work together
- Start by opening your video project in your favorite video editing tool (like Adobe Premiere Pro). Export a draft version.
- In your MarkUp.io account, click Upload to add your draft as a Video MarkUp. Remember to pop it into the relevant Workspace or Folder!
- Share the MarkUp link with your team on a dedicated channel in your communication tool. For example, if you’re a Slack user, you can set up a specific channel named ‘Video edits: V1’ for the first round of edits.
- Sit back and let your team or clients add comments to the Video MarkUp.
- After gathering feedback, head back to your video editing tool to make changes. Upload a new version to MarkUp.io for further review.
- Separate this new version into a Subfolder to keep track of your different versions/stages of edits.
- Once all feedback has been addressed and resolved, export the final video version, and share it with your client. 🙌
💡MarkUp better
Create dedicated Folders for priority stages. Imagine effortlessly sorting your MarkUps by priority levels. That’s what Folders allow you to do! They make tracking the status of every project asset a breeze, providing you with a clear picture of which ones need urgent feedback. To add an extra layer of organization, you can create Subfolders up to five layers deep.
Zoom in. Eager to scrutinize every detail of your Video MarkUp? Simply scroll with your mouse (this one:🖱️, not this one:🐭), and you’ll be able to control your zoom level precisely. This gives you enhanced control over pin placement, ensuring every detail is captured in your review.
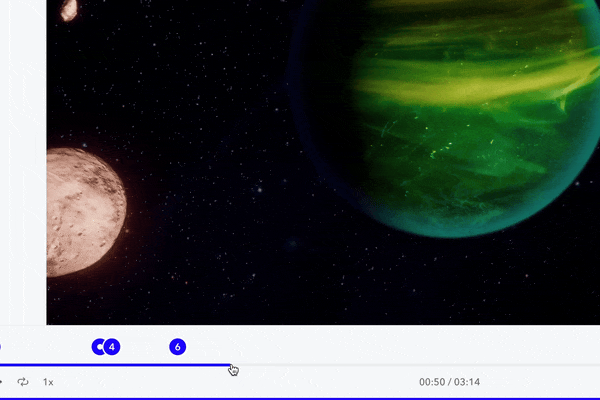
Video scrubbing. Want to leave frame-by-frame feedback on your Video MarkUp? Well, you can–with our video scrubbing feature. Use the left and right keys on your keyboard to find the exact moment in your Video MarkUp where you want to leave a comment. Drop a pin explaining what needs changing, and your team can get right to it.
Improving communication & project management efficiency for marketing teams ✍️
Juggling several projects at once is the norm for most marketing teams. But when it comes to gathering feedback on a project, scattered communication can lead to misunderstandings and delays.
However, using MarkUp.io will make it a cinch to manage multiple projects while significantly improving team collaboration.
And to make things even better, we’re gearing up to integrate with a few major project management tools soon–starting with ClickUp! Keep an eye open for more details soon. 👀
Tools used with MarkUp.io
Project management tools: Asana, Trello, Notion, etc.
Communication tools: Slack, Microsoft Teams, etc.
How your tools work together
- Create a fresh project in your go-to project management tool and invite key team players. Link the project to a shared MarkUp.io Workspace or Folder where reviews will happen.
- Now, it’s time to delegate! In your project management tool, break projects into smaller sub-tasks, and assign them with deadlines.
- Upload assets ready for review to MarkUp.io in the necessary format.
- Share the MarkUp URL link in your communication tool to notify everyone it’s ready for feedback.
- Tag teammates in MarkUp comments and track progress as they add feedback and make changes. Remember, keep all feedback chatter on the MarkUp so no one has to hunt for comments in your project management tool!
- Once finished, move finalized assets to a new Folder or Workspace in MarkUp.io for final stakeholder sign-off (try saying that ten times fast 😵💫).
- Update asset status in your project management tool once approved. ✅
💡MarkUp better
Set up your team. Add your regular collaborators– stakeholders, reviewers, and team members–to your MarkUp Workspace as Members. This makes it easy to tag them and lets them see all your Folders and MarkUps right away. The best part? They won’t have to keep asking for share links, which makes things faster and helps everyone work better together. Pro tip: If you want Members to have access to our integrations, upgrade their status to Admins.
Never miss a mention. Ever missed a mention because you didn’t comb through the comment thread with a fine-toothed comb? Well, stress no more! 💪Our mention filter highlights the comments mentioning you both in the original and subsequent thread comments. So, you can kick back, relax, and head into the weekend with the sweet assurance that you’ve got everything covered.
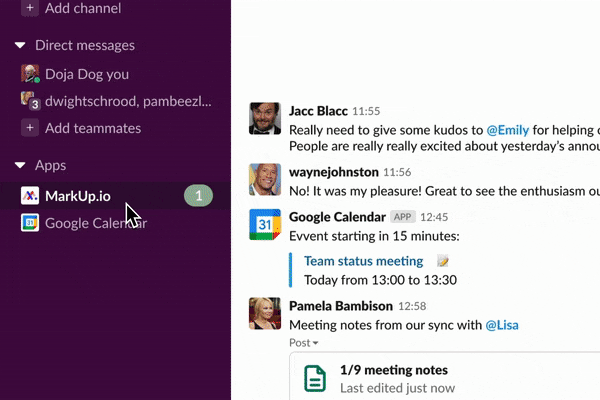
Cut the Slack. Every marketer and project manager on the planet is (or should be 😉) using Slack. So, vamp up your review process with MarkUp.io’s Slack integration! Get MarkUp notifications directly in your Slack workspace – either in your DMs or your favorite channels. That way, when a new round of edits on your latest social media campaign comes in, you’ll immediately get notified about it in a tool you already use daily!
Simplifying communication and collaboration for design teams 🎨
Design teams expertly use many digital tools to breathe life into their designs.
But here’s the twist – vague or unclear feedback can throw a wrench in the works, causing confusion and delaying the design process.
This is even more challenging when most feedback is collected async.
That’s where MarkUp.io comes in. Using it with tools like Figma or Slack can keep communication flowing and clients up-to-date on the latest iterations.
Tools used with MarkUp.io
Design tools: Figma, Adobe XD, Sketch
External communication: Gmail, Slack
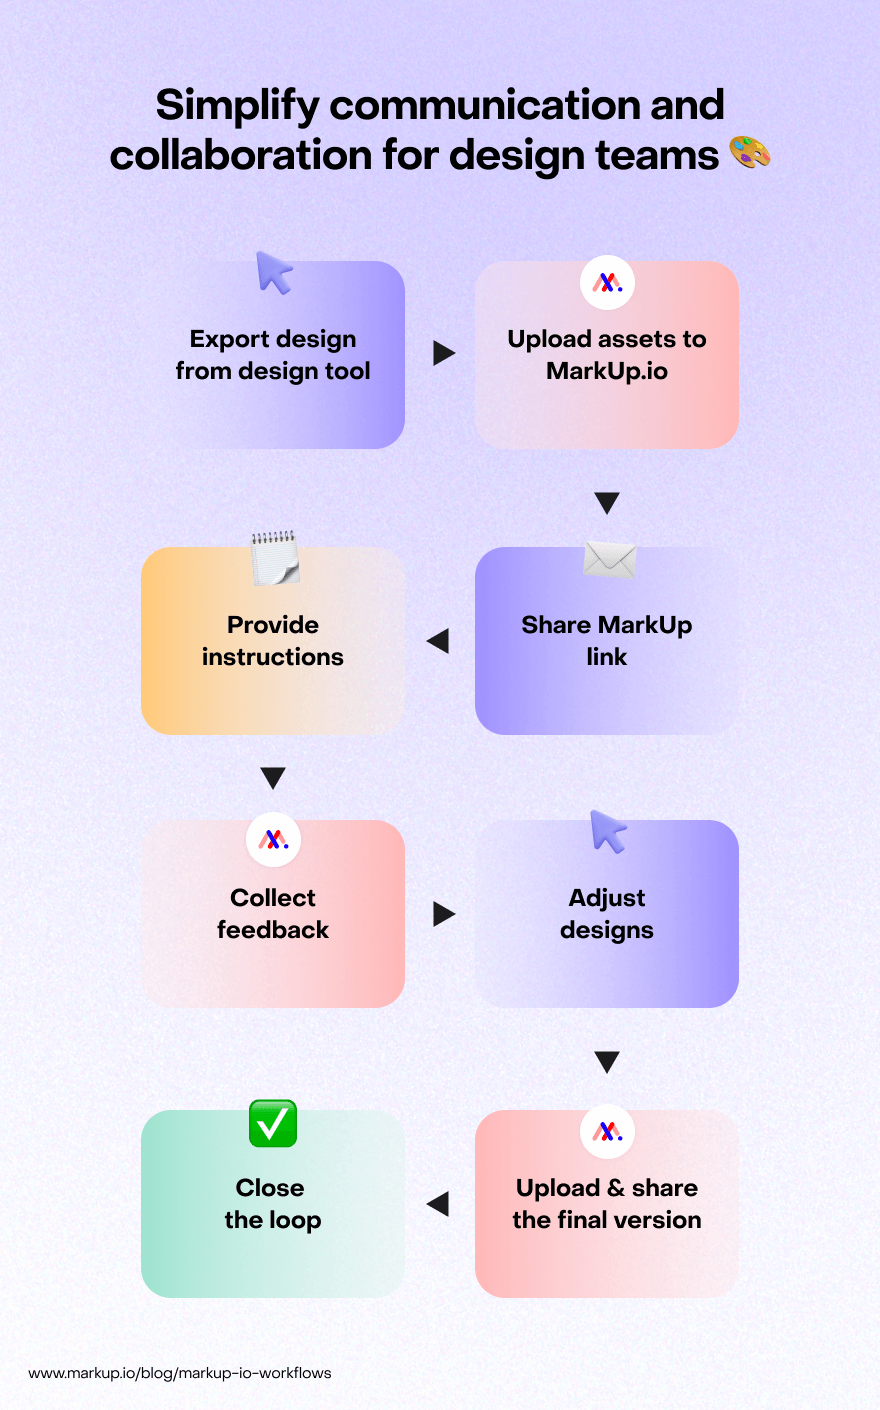
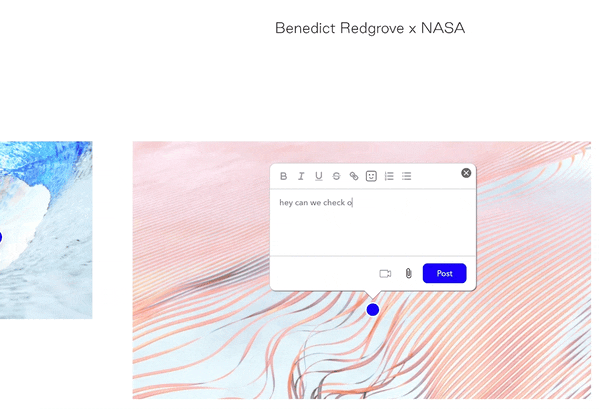
Imagine a design agency looking to streamline its review process with MarkUp.io. They extract images from Figma, pop them into MarkUp.io, and voila–all their feedback is in one place. 🫶
Then they bring in the stakeholders, who can drop their thoughts and suggestions right on the MarkUp. Designers tackle these comments, update the images, and upload them to the same MarkUp. This way, they have a neat timeline of all the revisions they’ve made. When all’s said and done, they tie a bow on it and send the final versions over to the client.
And the cherry on top? This lets stakeholders look at prototypes and mockups without having to sign up for a design tool account. After all, you don’t want casual reviewers wandering around your Figma files, nor do you want to train them on how to use it.
Think of it this way: Your design tool is where you build, and MarkUp.io is the place where you collect feedback. This keeps the original files safe and sound from any accidental edits. 🎉
How your tools work together
- Upload your digital content to your MarkUp.io Workspace.
- Even though you can’t upload a full Figma file to MarkUp.io, don’t fret. Just export the part you need (as a PNG, JPG, PDF, or SVG) and upload it to the platform.
- Click the Share button in the top-right corner of your screen to create a shareable link. Drop this link into an email (or however you communicate), and off it goes to your reviewers.
- While passing along the share link, give clear instructions on how to use MarkUp.io for review. (Psst–here’s an email template you can adapt).
- Prompt stakeholders to use the Comment/Browse feature to drop pins anywhere they like on the MarkUp.
- As feedback rolls in (in real-time!), adjust your designs accordingly.
- Share the final version with stakeholders via a MarkUp link, and email the finalized assets in the required format.
- Close the loop by sending a thank-you email acknowledging their feedback and outlining any next steps.
💡MarkUp better
Mimic your cloud storage folder structure: Set up Folders in your MarkUp.io Workspace that mirror the structure you use in your cloud storage. This will make it a lot easier to find and manage your projects.
💡 For bonus organization points, here’s a tip from Do Digital’s workflow: Label your MarkUps with project and revision numbers. This will help you quickly locate specific projects and track their progress.
Export your comments. If you’re an agency charging for work, keeping track of all the MarkUp comments team members are resolving in real time can be frustrating. To keep a complete record of all your comments, simply set up our Zapier integration and use this template to add them to Google Sheets rows automatically.
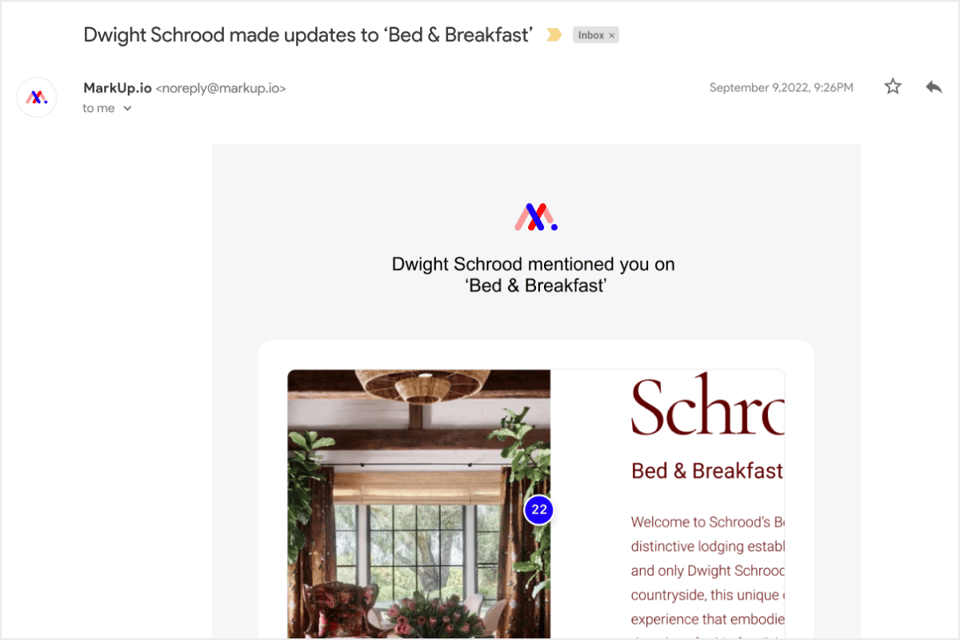
Customize notifications. If you’re working with clients or team members who insist on email communication, 🙄 show them how to set up MarkUp email notifications. They can easily do this in-app or by email.
Set up a review channel. If you’re a Slack enthusiast, broadcast updates to team members in any Slack channel using the Slack Bot! You can subscribe a channel to specific MarkUps or broadcast all updates. This lets you stay informed about changes and feedback in real time and keep the feedback conversation flowing.
Enhance collaborative feedback for CRM web projects 🌐
When you’re staging a site or in the design development phase, gathering feedback is crucial.
This is where MarkUp.io truly shines. 🌟
It provides a simple collaborative canvas where web designers can comment on wireframes, mockups, and other webpage elements.
And by using MarkUp.io alongside specific tools, web designers can also communicate more effectively with clients. Here’s how!
Tools used with MarkUp.io
CRM tools: Salesforce, Zoho CRM, Microsoft Dynamics 365
Communication tool: Loom
MarkUp.io is super useful when used alongside your CRM tools to amp up collaboration on web projects. For example, if you have lots of long-form HTML pages on Salesforce, you can just pop a link to one of the pages straight into your MarkUp.io Workspace.
This not only creates a collaborative environment with full visibility of what everyone is working on but also lets you collect all your feedback in one place.
And if you need to give more visual context to your comments? Don’t hit that Zoom button – just Loom it instead. Our Loom integration lets you record your screen and face so you can give your team even greater detail with video feedback.
How your tools work together
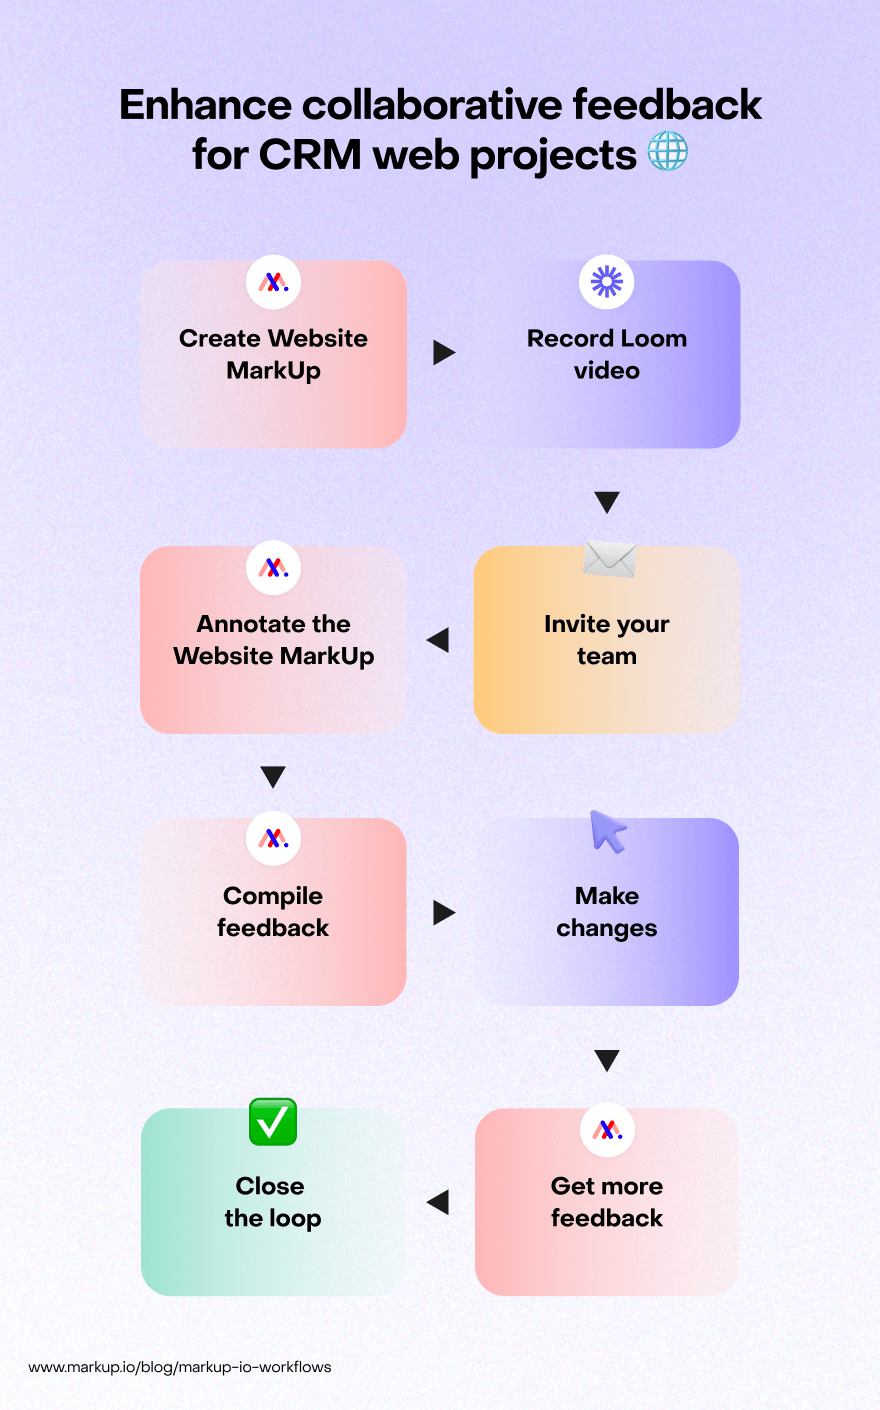
- Head over to MarkUp.io and kick off a fresh Website MarkUp by plugging in the URL of the live page you want to review – let’s say it’s a Salesforce HTML page.
- Next, whip up a brief Loom video. Describe the project, offer a quick MarkUp.io tour (in case your team isn’t fully onboard), and share the ins and outs of leaving feedback.
- Invite your team members to view the MarkUp by popping the Loom video and MarkUp link into your communication channel of choice.
- Once in the Workspace, team members can annotate the website directly to show where changes need to be made to the front-end design. They can also reply to comments, resolve issues, or tag other teammates.
- Once the first review wraps up, compile all the feedback and import it into your CRM. Within your CRM, create an action plan based on the feedback and assign tasks to specific team members, with set deadlines so you can monitor their progress.
- Carry out the necessary web design changes, making sure to focus on edits that improve the user experience of your site. Then use MarkUp.io to get another round of feedback from your team on the same Website MarkUp.
- Once that feedback has been addressed and implemented, the assigned team member can update the MarkUp and CRM tasks as complete or resolved.
💡MarkUp better
Take a shortcut. While working in MarkUp.io, why not make friends with keyboard shortcuts? For example, use ‘Shift + Enter’ to create a line break, ‘Ctrl/Cmd + A’ to select all, or @project to notify everyone in the MarkUp. These time-savers make text formatting, navigation, and collaborating in a MarkUp a breeze. Get the full list here!
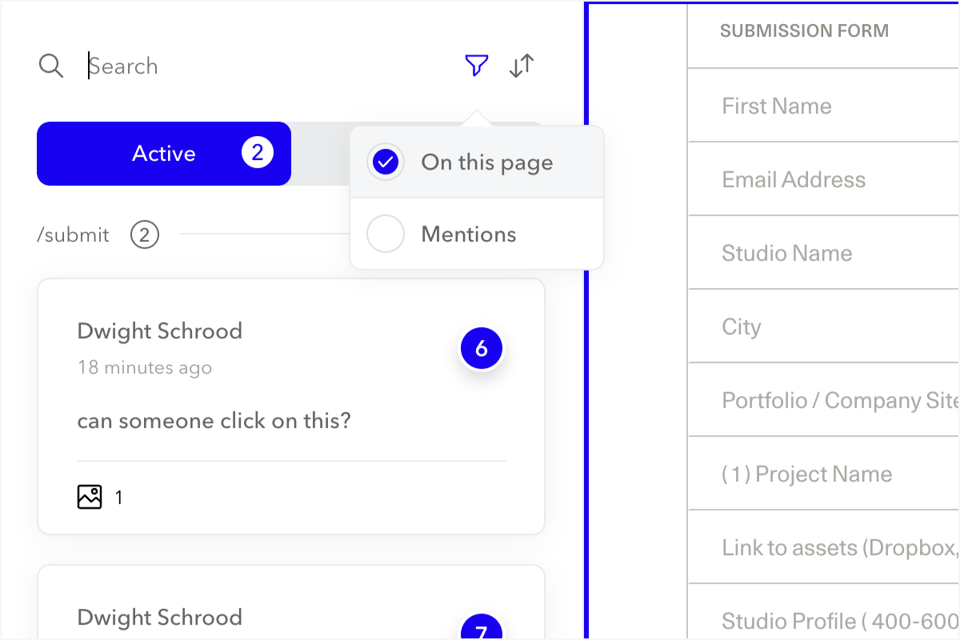
Use the “on this page” filter: Sifting through a mountain of comments from different pages of a multi-page website can be a bit much. That’s where the on this page filter comes in. It lets you zero in on the comments relevant to the page you’re currently tackling. This sweet feature keeps your review process neat and tidy and your feedback on point.
Automating tasks & facilitating content reviews for low-code web developers 💻
Building a low-code website is no easy feat.
And leaving feedback on a live website while real-time changes are being made can be like trying to hit a moving target. 🎯
But there’s good news! By combining some of the tools in your arsenal with MarkUp.io, you can actually make collecting website feedback way, way easier.
Tools used with MarkUp.io
Automation tool: Zapier
Site/content building tools: Webflow, WordPress, Ceros
When it comes to gathering feedback on website builds, automation is a trick you really can’t afford to miss.
It shifts the focus of low-code web development from repetitive tasks and endless content reviews to creativity and critical thinking.
So, when you combine the power of MarkUp.io with automation, you enable your tools to do most of the heavy lifting.
But where do you start? Our Zapier integration, of course!
Zapier is an incredibly useful automation tool. It allows you to integrate MarkUp.io with a whopping 5,000+ web applications, so you can automate your repetitive daily tasks without writing a single line of code. 🤯
You can set up Zaps to:
…And more!
The easiest way to do this? Zap templates. Get the full list here!
This not only saves time but also ensures that no feedback gets overlooked.
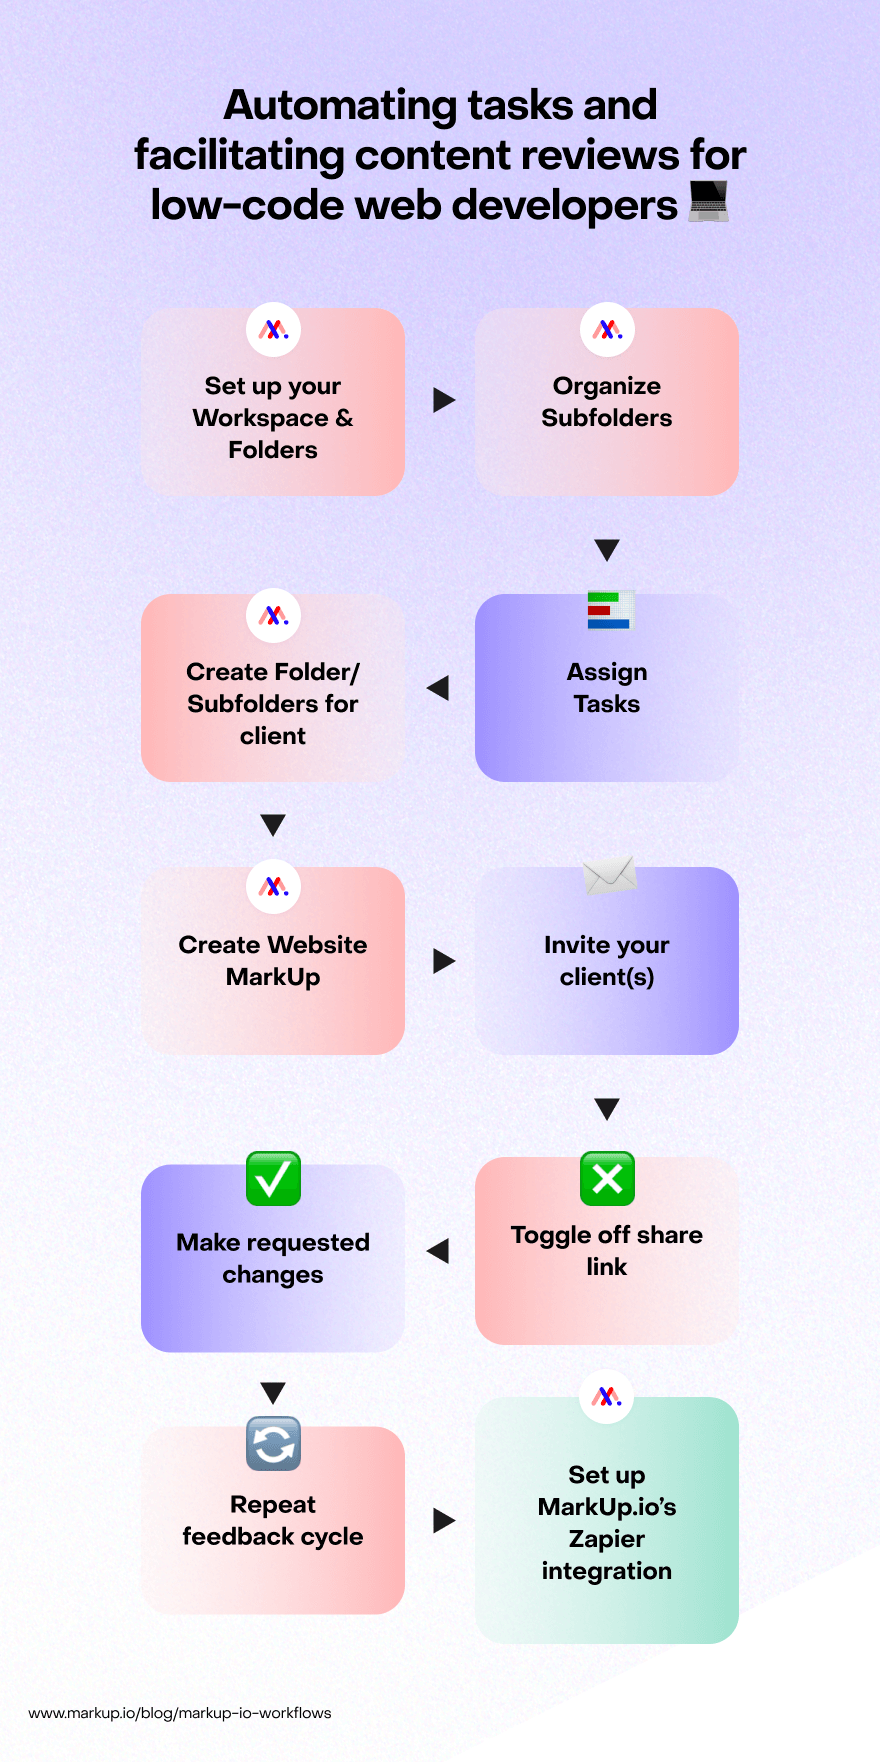
Imagine you’re part of a dynamic team that crafts and manages custom websites. Nestled within a dedicated Workspace, your team has carefully devised a strategy to streamline client collaboration and feedback management. This means you’re championing the use of dedicated Folders for each client, integrating those handy project management tools, and harnessing the power of MarkUp.io’s real-time website review features.
This approach puts an end to the marathon of email exchanges and sets up a centralized stage for gathering feedback during the course of website maintenance. It’s all about keeping things efficient, organized, and on point!
How your tools work together
- First off, ensure you’re in the correct Workspace (especially if you’re juggling a few). Set up a main Folder dedicated to each client you’re collaborating with.
- Within those main Folders, work your magic by creating Subfolders for different asset types.
- In your project management system, let your project manager do their thing by assigning the right tasks to the right people.
- Now, it’s MarkUp.io time! Cruise over to the Workspace and create a Folder/Subfolders to house all the assets for this client’s project.
- Drop the URL of the website’s staging link in the Subfolder. Ta-da! You now have a Website Markup.
- Invite the client to review the Website MarkUp as a Guest user. This way, they won’t have access to everything in your Workspace.
- Once the client’s done leaving comments, it’s your team’s time to shine. To stop the client from leaving more feedback on the Website MarkUp, toggle off the share link.*
- Make changes for the client. Toggle the MarkUp access back on and fire over that link once more for another revision round.
- Rinse and repeat until you’ve caught every bit of feedback.
Want an extra touch of efficiency? Of course, you do. Here’s how to set up a Zap using Zapier:
💡 Always set up a Zapier account before you start working on a project that includes tasks that need automation. While Zapier can do many things, it can’t automate projects already started. 🤷
- Log into your Zapier account.
- Find the Make a Zap button in the top left corner.
- Make MarkUp.io the trigger app.
- Choose the desired action (like MarkUp Created) as the trigger event.
- Link your MarkUp.io account.
- Select your project management tool (let’s say monday.com) as the action app.
- Choose an action, like Create Item or Update Item Name to seamlessly sync the MarkUp with your project management tool.
- Test your Zap to ensure perfect synchronization. Once you’re satisfied, launch the Zap and watch the collaboration between MarkUp.io and your project management tool unfold seamlessly.
💡MarkUp better
Fix bugs collaboratively. When it comes to ongoing website maintenance, leverage the power of shared Website MarkUps. Whenever your client spots a pesky bug, they can drop a comment directly onto the MarkUp and tag the right folks to swoop in and fix it. This way, you’ve got a dynamic, collaborative feedback loop that ensures swift resolutions and keeps your client’s website shining bright. 🚀
💡 We can’t take the credit for this awesome tip–it’s an insight borrowed from the workflow of Webflow developers, Flow Gurus. Thanks for being such kick-ass users!
Streamlining approval notifications. Using our Zapier integration (and a paid Zapier account), you can actually set up a template that will notify you whenever a MarkUp is ready for sign-off. So you automatically have a record in Asana of what’s been approved. Set up a Trigger from MarkUp.io for ‘Comment created’, select ‘Filter by Zapier’ as the Action, and then set the Filter as ‘Data Comment First Message Text.’ You can then set the message text to ‘Approved’ and the second Action to ‘Create story in Asana.’ Then whenever your reviewer comments the word ‘Approved’ in a MarkUp, you’ll get a notification that it’s ready to go!
Use the Chrome extension. Speed up your workflow by creating Website MarkUps seamlessly right from your browser. What’s more, by installing MarkUp.io’s Chrome extension, your screenshots will upload much more quickly!
Later gator!
Now that you know how to sync your tools up with MarkUp.io, there’s no stopping you! 💪
We’re constantly working on new integrations to make your creative stack even more efficient. To stay updated on our latest integrations or share your experiences with MarkUp.io, join our vibrant community and say hi!
And if you wanna see what all the feedback fuss is about, sign up for your 30-day free trial!